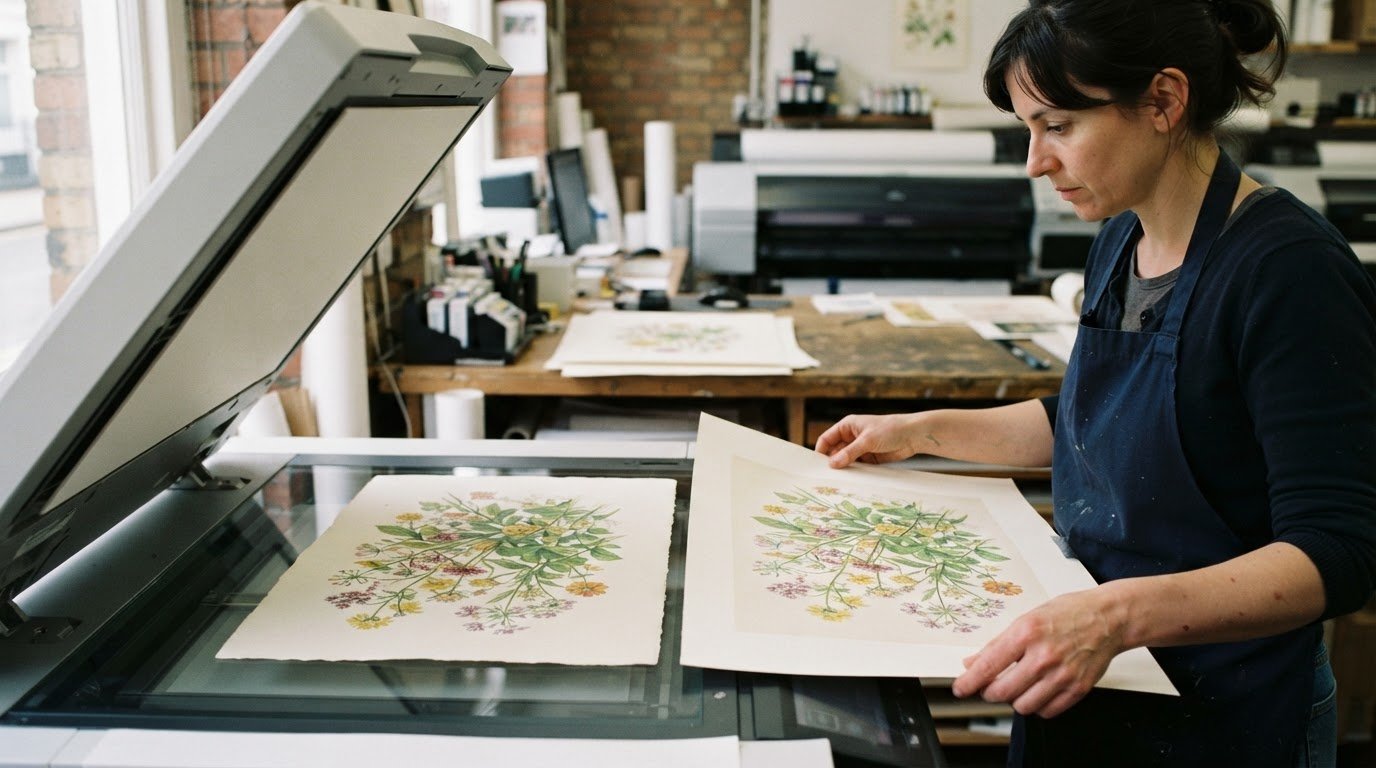
Resizing artwork is more than making an image bigger or smaller. Knowing how to prepare artwork for print means matching its dimensions and resolution to the finished piece, so details remain clear at the intended viewing distance.
You’re right to consider image quality first, but the final size, colour and finishing also affect how artwork prints. A professional prepares the file for its specific use, checks that the resolution suits the output, sets the colour mode for print and adds bleed where the design runs to the edge. For standard prints, 300 DPI is a useful target; large-format work viewed from a distance may suit a lower resolution.
This guide explains what to provide and how a print professional handles scanning, resizing, colour profiles and pre-flight file checks. You’ll also learn why a high-resolution original matters, how final dimensions affect image quality, and what to consider for posters, brochures and other printed materials.
Key Takeaways
- Supply a clean, well-lit scan or photograph of the original so fine detail and colour can be assessed.
- Match the artwork’s pixel dimensions to the final print size before resizing, since enlarging a low-resolution image can reduce clarity.
- Prepare a print-ready PDF with fonts embedded or converted to vector paths, and include bleed when the design runs to the edge.
- Use a soft proof or test print to review how colours may appear on the selected paper before approving the final file.
- Check that the trim box matches the finished dimensions and keep essential text and imagery safely inside it.
Color correction and paper color profiles
Make colour decisions for the intended print process and paper, not just for your monitor. Ask the print professional to check tones, texture, colour mode and paper settings before approving the final file.
-
Ask a print professional to adjust artwork colour tones and textures
Ask the print professional to review shadows, highlights and midtones in the original artwork. A dark textured area, for example, may lose detail if corrections push its deepest tones too close to black. Point out colours and surface details that must stay clear, such as a warm background or fine pencil marks. Rather than asking for stronger saturation in general, identify the tones that need adjustment.
-
Confirm colour modes and paper profiles with your print provider
Ask which colour mode and profile the final print file needs. RGB describes screen colour, while CMYK is the usual colour model for print artwork, and conversion can change some colours. Confirm the CMYK profile and paper preset for the specific job instead of selecting a generic setting. Paper presets help account for how the chosen stock affects the printed result.
- Specify the intended paper type when colour accuracy matters. A profile for one paper may not suit another, because the paper’s colour and surface affect how printed ink appears. For example, a colour that looks clean on bright white stock may look different on a warmer sheet. The print professional can apply the relevant paper settings, prepare a suitable proof and assess whether further correction is needed.
Keep the original artwork alongside the corrected version. It gives the professional a reference if a colour looks muted or a texture loses definition after conversion. Name the versions clearly, for example, “original” and “print colour,” so the production file is easy to identify. Avoid repeated adjustments based on screen appearance alone, as monitor settings can make colours look different from the finished print.
- Review a soft proof or test print before approving the final file. A soft proof previews how the selected profile may affect the artwork on screen; a test print shows colour and texture on a physical sample. Compare the proof with the original under consistent viewing conditions. Check specific details, such as skin tones, a brand colour or fine linework, rather than asking only whether the overall image looks brighter.
Record the approved profile, paper preset and correction notes with the final artwork. If you use different paper later, those settings may need reviewing. Clear notes help the professional distinguish deliberate colour choices from unwanted shifts and focus revisions on the parts of the artwork that matter.
Image resolution for standard and large-format printing
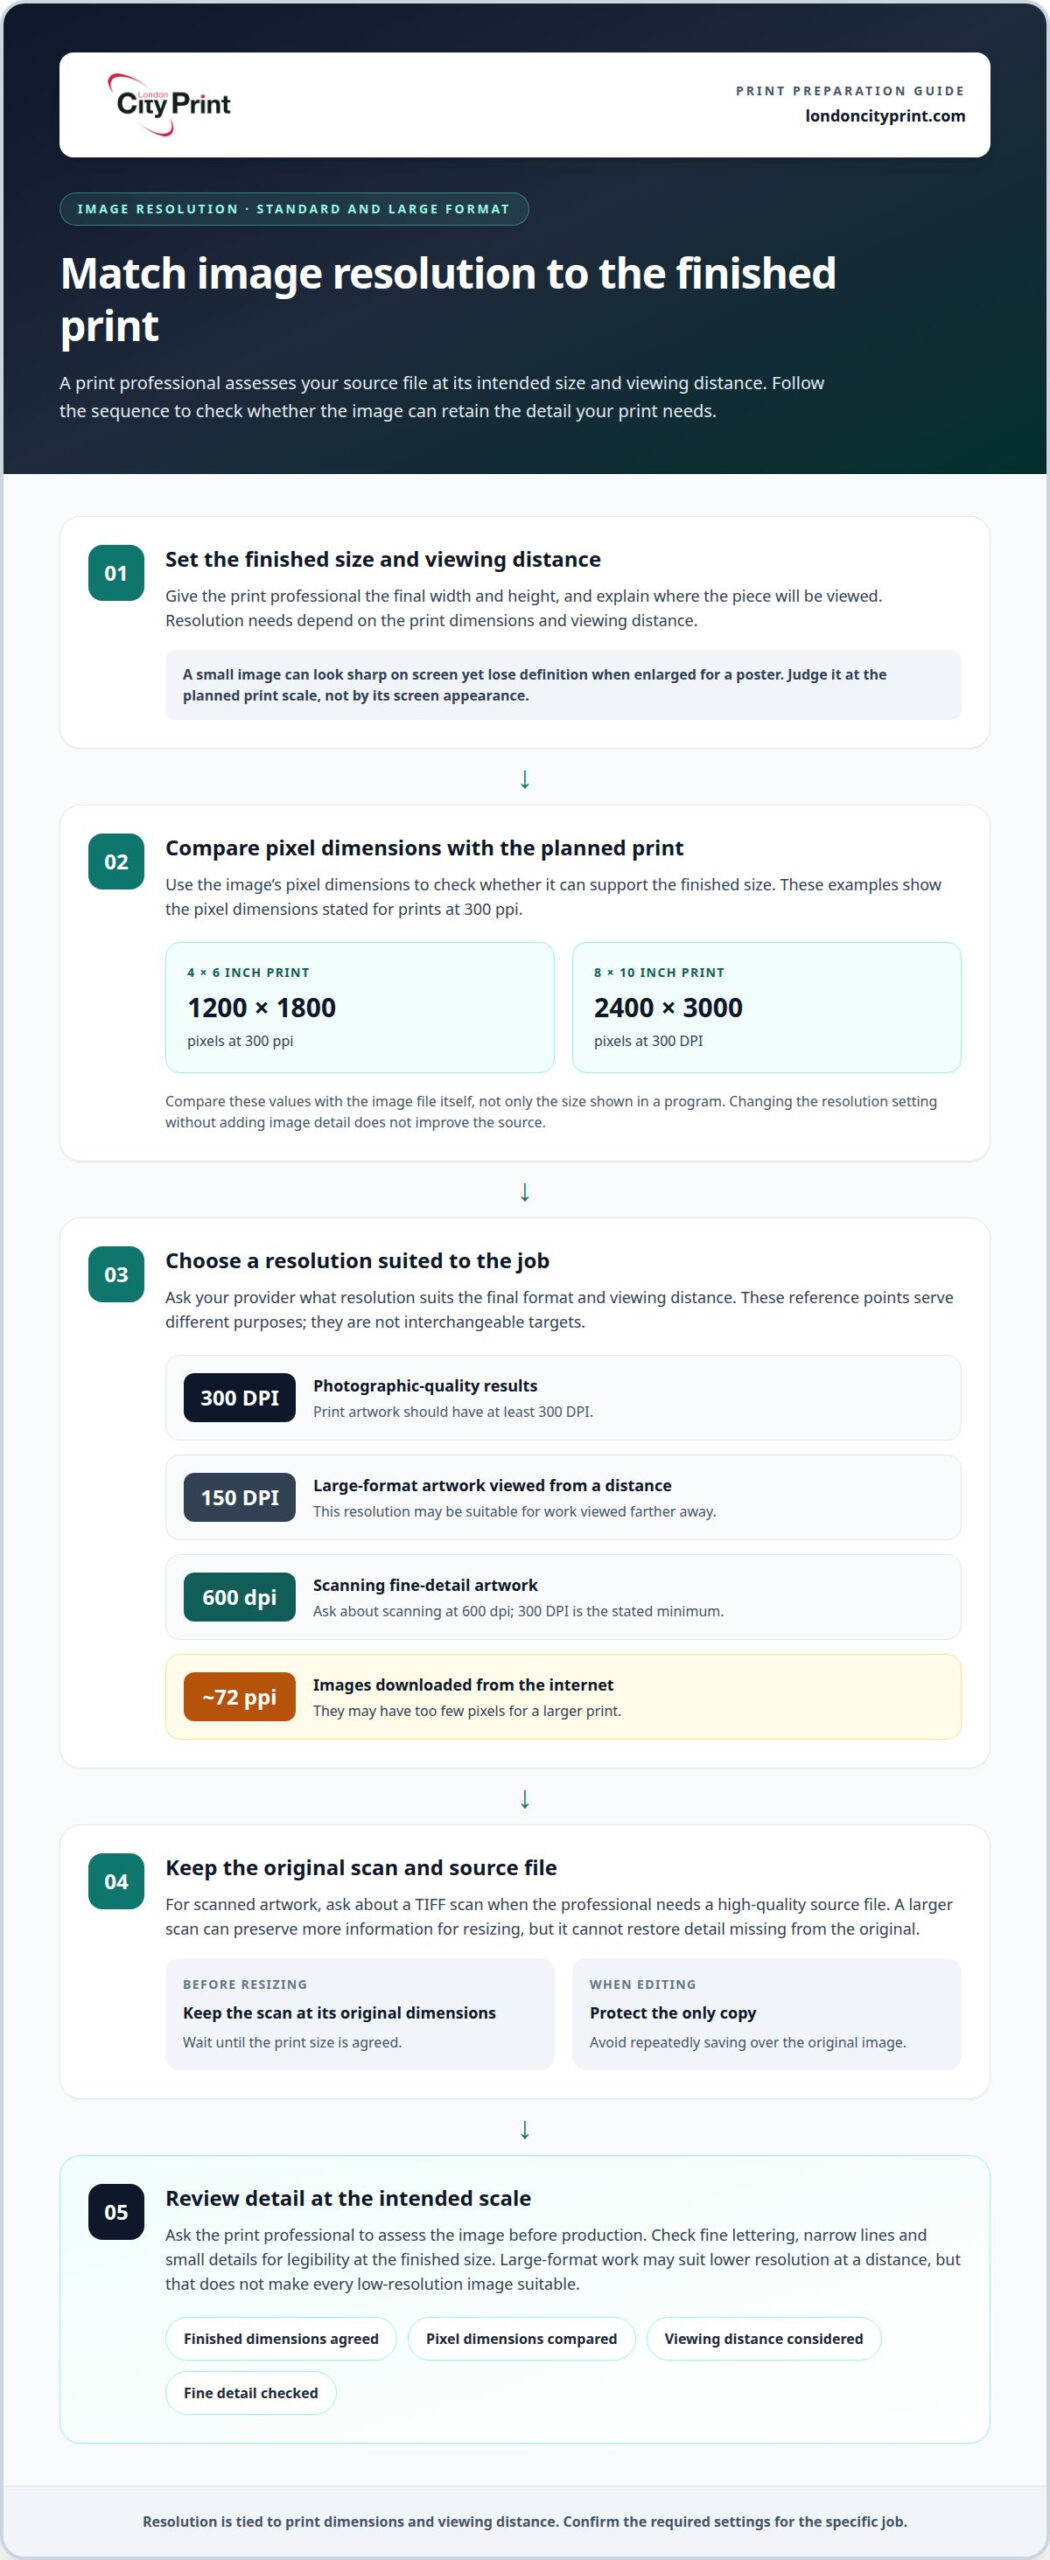
Match image resolution to the final print dimensions and viewing distance. A print professional can assess whether your source file will retain detail at its intended size.
-
Have a print professional check artwork dimensions and scale
Provide the finished width and height, then ask the professional to assess the image at that exact scale. Resolution describes how image pixels map to the printed area, so enlarging an image spreads the pixels over more space. A small image may look sharp on screen but lose definition as a large poster. Don’t judge suitability by screen appearance alone.
-
Confirm the resolution needed for your print size with your provider
Ask what resolution suits the final format and viewing distance. For photographic-quality results, print artwork should have at least 300 DPI. A 4×6-inch print at 300 ppi needs an image measuring 1200×1800 pixels. For large-format artwork viewed from a distance, 150 DPI may be suitable. The required pixel dimensions change with the finished print size.
-
Ask your provider about scanning resolution and file format
For scanned artwork, ask about scanning at 600 dpi to capture fine detail; 300 DPI is the stated minimum. Request a TIFF scan when the professional needs a high-quality source file for preparation. A larger scan can preserve more information for resizing, but it cannot restore detail absent from the original artwork. Keep the scan in its original dimensions until the print size is agreed.
- Use pixel dimensions to judge whether an image can support a planned print size. For an 8 by 10 inch print at 300 DPI, the example canvas measures 2400 by 3000 pixels. Compare those dimensions with the image file, not just its displayed size in a program. Changing the resolution number without adding image detail does not improve the source; enlarging pixels can soften edges and textures.
Consider where the finished piece will be viewed. Large-format artwork viewed from farther away may work at a lower resolution than a print viewed close up. That doesn’t make every low-resolution image suitable. Fine lettering, narrow lines and small details still need enough image information to remain legible at the intended scale.
- Tell the professional where the image came from and how it will be used. Images downloaded from the internet often have around 72 ppi, which may leave too few pixels for a larger print. Artists supplying a scan should include the original file and intended dimensions. A camera image may also need cropping or resizing before production, so avoid repeatedly saving over the only copy.
- For large graphics intended for mounted display, such as foam board printing, share the finished dimensions and viewing context with the print professional. They can assess whether the image resolution supports the format before the file moves to production. That check helps identify soft details early and keeps resizing decisions tied to the actual print, rather than an arbitrary screen setting.
How do I print my artwork?
Knowing how to prepare artwork for print starts with matching the file to the product. Confirm the format, fonts, bleed and proofing requirements before approving production.
-
Check product-specific print requirements with your provider
Send the artwork and specify the product, finished size and intended use. Ask which file settings suit that format, including colour mode, bleed, trim dimensions and finishing requirements. A poster, multi-page document, or fabric item all need different preparation—for example, preparing graphics for themed group apparel like the matching collections from Adorb Custom Tees calls for distinct resolution and contrast settings compared to paper. Don’t assume one export setting works for every product; a print professional can check the file against the job specifications.
-
Choose a print file format with your provider
Ask whether to provide a high-resolution PDF, raster image or editable vector artwork. A PDF can preserve layout and fonts for print, while vector graphics can scale without losing resolution. Raster formats such as PNG store artwork as pixels, so detail depends on image dimensions. Keep the original editing file too, particularly if a professional needs to adjust individual pieces or elements.
-
Ask your provider about exporting artwork as PNG or PDF
Ask the professional to export the final canvas in the format required for the job. In Adobe Illustrator, save or export the completed artwork as a PDF; in Photoshop, save or export a PDF from the finished image. The professional should check that fonts are embedded or converted to vector paths, while preserving the intended dimensions and layout.
PNG can suit raster artwork when the print professional requests it, but not every PNG is print-ready. Confirm its pixel dimensions and colour settings before export, and avoid repeatedly resaving a compressed image during editing. A key part of how to prepare artwork for print is choosing an export format that preserves the detail the finished product needs.
-
Ask your provider to check for common print-file errors
Ask for checks on missing fonts, low-resolution images, incorrect dimensions, unwanted scaling and absent bleed. These issues can change text appearance, soften images or expose unprinted edges after trimming. For edge-to-edge artwork, supply 3 mm of bleed on each side and keep essential text away from the trim. A professional can identify and correct file errors before production.
- Request a soft proof or test print before approving the final artwork. Check the canvas and page orientation, text legibility, image detail and colour. Review crop marks and bleed where they apply, and compare the proof with the approved design. Knowing how to prepare artwork for print also means gathering corrections into one clear set of instructions before the final export.
Professional resizing of artwork for print
Start resizing with the finished print dimensions, not an arbitrary percentage. A print professional can assess the original, preserve its proportions and prepare a file for the intended output.
- Give the professional the final width and height, along with the artwork’s intended use. A square image for a poster, for example, needs a different layout from the same image on a wide panel. The professional can compare the original proportions with the requested format and determine whether the design needs cropping, added space or a different composition.
- Ask for the trim box to match the final print measurements. The trim box defines the finished area, so it must reflect the size you expect after trimming. For a design printed on an 8.5 by 11 inch sheet, the maximum image size given is 8.25 by 10 inches. On an 11 by 17 inch sheet, the maximum image size is 10.75 by 16 inches.
- Have the professional assess the original before enlarging it. Resizing changes how the existing image information fills the new dimensions; it doesn’t create detail that the source lacks. A small scan enlarged to fill a large print, for instance, may show soft edges or blurred texture. Fine art with delicate brush marks needs particular attention during enlargement.
- Ask how the artwork will be adapted if its aspect ratio differs from the final format. Cropping can remove part of the original, while stretching can distort faces, lettering and geometric shapes. A professional can show how cropping affects key elements and keep important content in proportion. Agree on the composition before approving the resized file.
- Confirm that the resized file retains the required image quality at its final size. Resolution depends on both pixel dimensions and the area those pixels cover, so changing a document’s size setting alone may not add detail. A professional can inspect edges, text and textures at the intended scale, then identify where the source needs different treatment.
- Review the final layout at its actual dimensions before production. Check that the trim box matches the agreed size and that essential content isn’t too close to the edge. For example, a fine art image prepared for a narrow frame should retain its focal detail after trimming. Approving the final dimensions and crop together helps avoid unnecessary changes later.
How can a print professional check artwork dimensions and scale before printing?
A professional checks the final dimensions against the trim box, page layout and intended print scale. Provide the finished measurements and artwork file together, so they can assess the same production version.
- Provide the finished width and height, along with the product format. The professional compares those dimensions with the artwork’s page size and trim box. The trim box should match the final print measurements. For example, artwork set up on a larger sheet may print at the wrong scale if the production file uses different trim dimensions.
- Ask the professional to inspect the scale settings in the design file and PDF. A document can appear at the right size on screen while its print settings reduce or enlarge it. The “fit to page” option automatically shrinks artwork to fit the printable area and can cause scale errors. The professional should compare the intended dimensions with the exported file.
- Have the professional check the artwork against the printable area. Crop marks indicate where the sheet should be trimmed, while the trim box defines the finished size. If artwork extends to the edge, the file needs suitable bleed beyond that box. Keep important text and logos inside the finished area, not on a trim line.
- Confirm that the file has the correct orientation and proportions. A portrait design placed in a landscape format may need rotation, cropping or a revised layout. The professional can identify whether scaling would distort circles, logos or lettering. Ask them to preserve the original proportions rather than stretch the artwork to fill a different shape.
- Request a final-size preview or proof showing the trim and placement. Check that the artwork sits evenly, crop marks align with the trim box, and essential content stays inside the finished area. For a multi-page PDF, the professional should review every page, as one page may have different dimensions or placement from the rest.
- Approve the measured production file, not an earlier draft. The professional can record the agreed dimensions and scale alongside the final PDF, helping prevent a later version from replacing it accidentally. If you need a precise size for a foam board print, send the finished measurements with the artwork for a dimensional check before production.
London City Print
London City Print can take your prepared artwork through to printed materials, including Booklets and Brochures, Posters and Roller Banners. If you need printed pieces rather than guidance alone, share the final dimensions, file format and intended use with your print team. These details help align the requested output with the artwork you have ready.
For multi-page projects, wire binding can finish documents in a format that lays flat. Choose a product and finish suited to how people will read or display the work, then provide the approved artwork for production.
Contact London City Print to discuss your print project and the artwork you’re preparing.
Move Your Artwork Towards Production
The next step is to match your approved design to the finished item you need. A clear conversation about how to prepare artwork for print can align the file, format and intended use before production. Consider how people will handle or view the finished piece, and include those requirements in the project brief.
London City Print produces Booklets and Brochures, Posters and wire binding. Each format calls for different layout and finishing decisions, so specify the output you want when discussing your project. A focused brief gives the print team a clear basis for advising on the next production steps.
Bring your artwork and project requirements together, then take the next step with Contact London City Print for print advice. Your finished design is ready to move forward.
Frequently Asked Questions
What file formats are best for print artwork: PDF, TIFF, or JPEG?
Choose a format based on whether the file is a finished layout or an image source. PDF suits a completed page design; TIFF can preserve a scanned original for later editing, while JPEG is convenient for sharing photographs. Send one clearly named production file and keep the editable original separately. This helps the print team distinguish the approved version from working drafts or alternate crops.
What resolution should artwork be for high-quality printing?
Check that the image has enough pixel information for its actual placement, then inspect fine detail at the intended output size. Look closely at small captions, thin lines and textured areas, which can reveal softness before larger shapes do. If the source contains several images, assess each separately: a sharp background photo doesn’t ensure that a small inset image will also reproduce clearly.
How can a print professional set up bleed, trim and safe margins for print?
Ask the professional to identify the finished edge, any artwork extending beyond it and the content that must remain visible. Also confirm whether crop marks should be in the supplied PDF or added during production. For a folded leaflet, review how panels meet at the folds and ensure key text doesn’t cross a crease. This checks the layout as a finished piece, not just as a flat page.
How can a print professional convert RGB artwork to CMYK for printing?
Provide the original artwork and identify colours that must remain visually consistent, such as a company logo or product label. This focuses the review on important elements instead of prompting broad changes across the whole design. Keep a separate copy of the original file so the approved source remains available if the artwork needs a different output or revision later.
How can a print professional choose and embed fonts in print-ready artwork?
Choose typefaces that suit the design and remain legible at the final viewing size. Ask the professional to inspect unusual characters, punctuation and symbols, especially in names, addresses or technical labels. Provide the editable artwork with the font names used, alongside the final file. This makes it easier to spot a substitution or missing character before approving the production version.
What colour profile should you ask your print provider to use for artwork?
Ask the print professional to name the output profile selected for your job and note it with the approved artwork version. Don’t reassign a profile just to make an on-screen preview look closer to the intended colour, as this can alter the file’s colour interpretation. If you reuse the design for different stock or a different product, treat it as a separate output decision rather than assuming the original settings still apply.
How can a print professional prepare images and graphics for large-format printing?
Ask the professional to review the composition at the intended display size and viewing distance. Simplify small text, check that logos remain clear, and make sure the crop keeps the main subject visible from the expected viewing position. A tall display, for example, may need a different image crop from a landscape poster. Share the placement or display context so the artwork’s hierarchy suits how people will see it.
Do print artwork requirements differ by printer or product type?
Yes. A multi-page booklet needs an ordered page sequence and a cover layout, while a single-page poster uses a different page structure. Finishing can also affect the setup: a folded piece needs panel planning, a bound document needs pages arranged for its binding method, and specialty branding items—such as the custom logo decals and personalised labels produced by Chlosha Creations—require clean vector cut lines and transparent backgrounds. Give the print professional the product type, finished format and finishing choice together, so the file can be prepared for its intended use.