What if the right window graphic starts with where people will see it, not just what you want to print? With window decal printing london, the glass dimensions, viewing direction and business purpose all shape the result. Plan the wording and layout around the side people will read it from, the distance they will view it at and the space available on the glass.
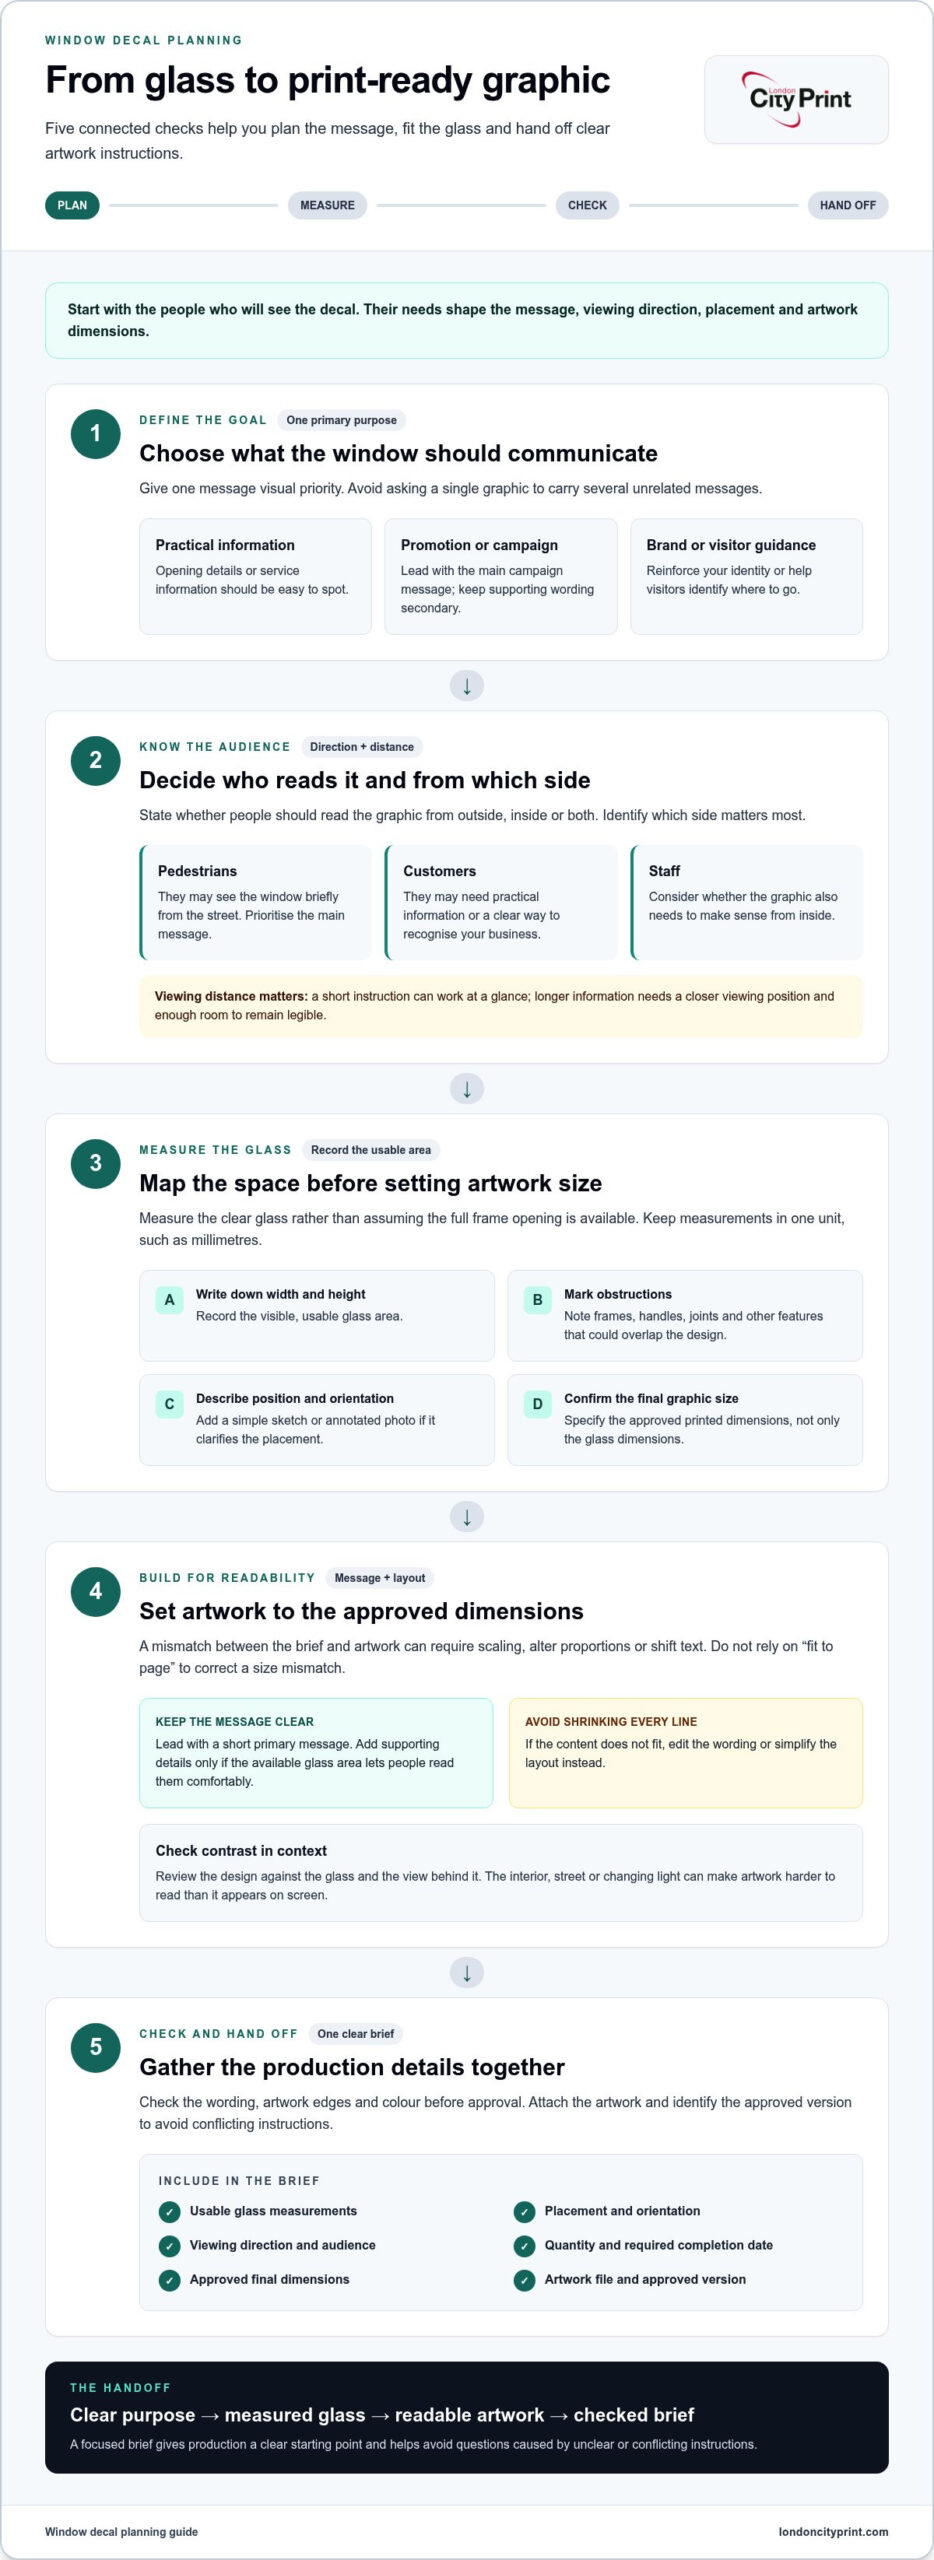
When you’re working to a business deadline, a clear brief helps turn an idea into a production-ready job. Include the usable glass measurements, decal placement, viewing direction, quantity and required completion date. Attach the artwork file and identify the approved version to help avoid questions caused by conflicting instructions.
This guide explains how to plan vinyl window graphics around your glass and audience, prepare print-ready artwork and organise a clear production handoff. London City Print produces vinyl window graphics alongside large-format printing. The practical checks below can help you prepare your project and reduce avoidable changes before production.
Key Takeaways
- Choose one primary purpose for your graphic, such as sharing practical information, directing visitors or promoting a campaign.
- Measure the usable glass area and record frames, handles and other obstructions before setting the artwork dimensions.
- For window decal printing london, prepare artwork to the approved final dimensions and remember that CMYK print colours may differ from screen colours.
- Check text, artwork edges and colour before approval to reduce avoidable production changes.
- Include quantity, orientation and required completion date in your print brief for a clearer production handoff.
Window Decal Printing London: Define Your Glass Needs
Start with what the window needs to communicate. A window decal is a printed vinyl graphic intended for application to glass. Its purpose, viewing distance and audience should guide the design. For example, a short opening-hours message needs a different visual hierarchy from a campaign graphic meant to attract attention from across the street. For a general overview of decal types and their background, see What is a Decal?
For window decal printing london, build your brief around the glass and the people who will see it. Decide what the graphic should help someone understand or do before you plan the artwork. That keeps the message focused and gives production a clear starting point.
What should a London business use a window decal for?
Choose one primary goal, then arrange supporting details around it. Passers-by may see the window briefly while moving along the street, while visitors inside can stop and read more. Give the most useful information visual priority, and avoid asking one graphic to communicate several unrelated messages.
- Practical messages: Make opening details or service information easy to spot and read from the expected distance.
- Promotions and campaigns: Prioritise the main offer or campaign message, with supporting wording kept secondary.
- Branding and visitor information: Reinforce your business identity or help visitors identify where to go.
A focused decal brief states the message, location and audience. A broader retail window graphics project may coordinate several visual elements across a shopfront or campaign. Set the scope at the start so the artwork serves the actual need without adding details that compete with the main message.
Who needs to read the decal, and from which side?
Decide the viewing direction before you settle the layout. Tell your print team whether people should read the graphic from outside, inside or both, and which side matters most. The same glass can serve different audiences, so state their needs in the production brief instead of leaving the viewing direction open to interpretation.
- Pedestrians may see the window briefly from the street, so give the main message clear priority.
- Customers approaching the entrance may need practical information or a clear way to recognise your business.
- Staff inside may see the graphic from the opposite side, so consider whether it also needs to make sense to them.
Viewing distance affects how much text people can read. A short instruction can work at a glance; longer information needs a closer viewing position and enough space to remain legible. Record the intended audience, viewing side and approximate viewing distance in your brief. These details will guide your measurements and placement decisions.
Plan London window decal dimensions, placement and readability
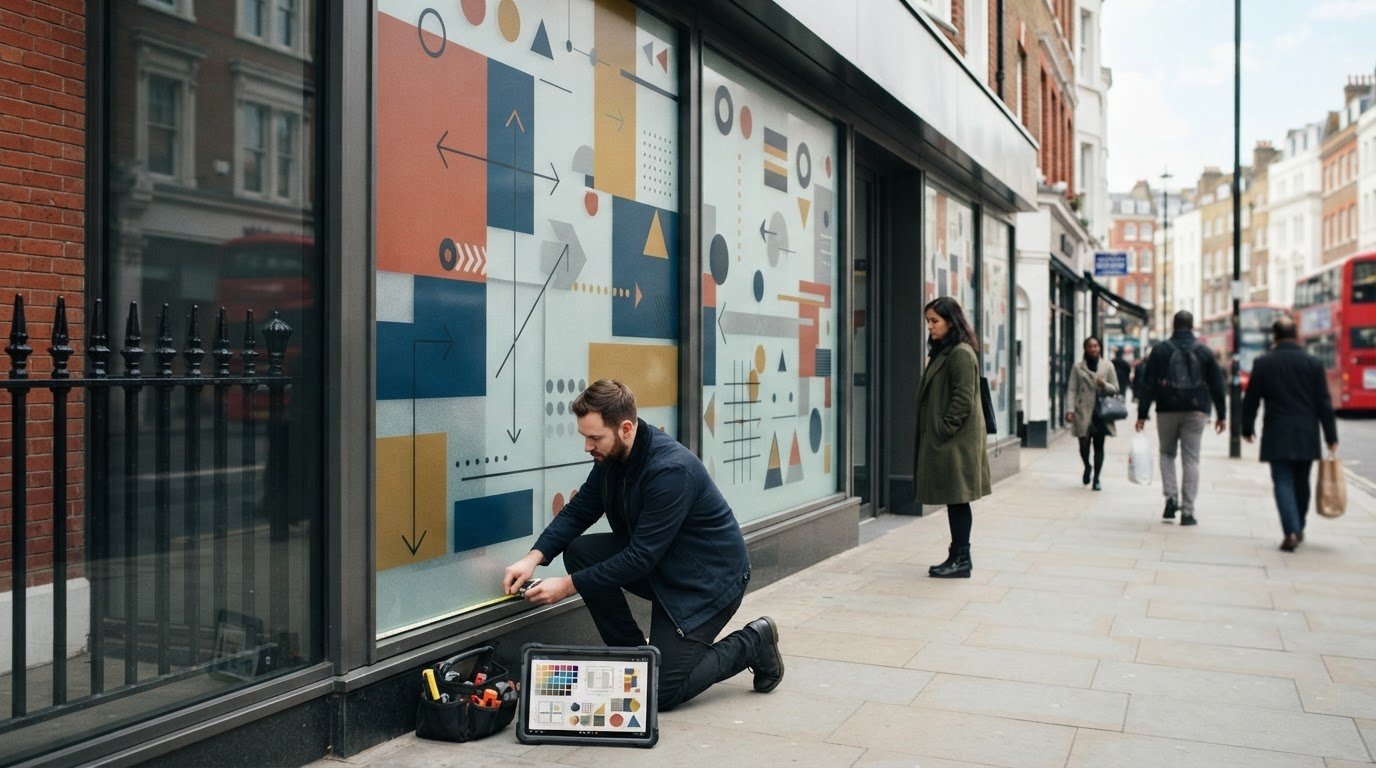
Accurate measurements help your window graphic fit the glass and communicate clearly. Record the usable area, identify anything that interrupts it and mark the intended position before setting up the design. For window decal printing london, this groundwork helps prevent artwork from overlapping a frame or placing key details outside the planned space.
How do you measure a window for printed decals?
Measure the clear, usable glass rather than assuming the full frame opening is available. Note the window’s orientation and where you want the graphic to sit. Keep measurements in one unit, such as millimetres, and use that unit in the artwork brief to avoid conversion errors.
- Record the visible glass area: Write down the width and height of the space available for the graphic.
- Mark obstructions: Note frames, handles, joints or other features that could overlap the design.
- Describe placement: State where the graphic should sit and its orientation. Add a simple sketch or annotated photo if that makes the layout clearer.
- Confirm final dimensions: Give the approved size of the printed graphic, not only the glass size.
Set the artwork to the approved final dimensions. If the file and brief use different sizes, the design may need scaling, which can alter proportions or shift text. Don’t rely on “fit to page” to correct a mismatch. This setting can shrink artwork automatically and create scale errors. Clear dimensions give the print team a more reliable handoff.
How can you keep window decal text easy to read?
Build the layout around what people need to notice first. Lead with a short primary message, then add supporting details or contact information only if the available glass area allows people to read them comfortably. Don’t shrink every line to make it fit. Edit the wording or simplify the layout instead.
Check contrast against both the glass and the view behind it. A design that looks clear on screen or against a plain background may be harder to read when the window shows the interior, street or changing light. Review the artwork in context where possible, and check that its colours and letter sizes remain distinct from the intended viewing distance.
Distance and space work together. People passing the window have less time to read than someone standing nearby, so use fewer, clearer words for a message viewed at a glance. A closer viewing position can support more detail, provided the layout remains uncluttered. These decisions matter for London custom vinyl window graphics as well as individual decals. For wider print-industry context, consult the Graphic Media Alliance’s Industry Standards in Window Decal Printing resource.
Before sending the file, compare its page dimensions with your approved measurements and check that text avoids the obstructions you recorded. London City Print produces vinyl window graphics, and its window decal printing information is available alongside details about its other print services.
Prepare window decal artwork for accurate London printing
Prepare your artwork in a set order so the final file matches the approved window graphic. For window decal printing london, correct dimensions, suitable image quality and clearly defined edges help the print team move from your design to production with fewer avoidable queries.
- Set the dimensions. Use the approved final width and height, and keep the same measurement units in the artwork and brief. Don’t scale the design later unless you’ve agreed to that change.
- Check resolution. Review the effective resolution of placed images at their final printed size. An image can look sharp when small on screen but become soft when enlarged. Use vector artwork for logos and text where available, as it can scale without becoming pixelated.
- Prepare the colour. Set the document’s colour profile for print and review the colours in context. CMYK describes how inks combine to create printed colours; screens display colour using RGB light. The two systems render colour differently, so a screen preview can’t guarantee an exact match to the printed result.
- Inspect the edges. Keep important text and logos safely within the design. If colour or imagery runs to an edge, add bleed, which is extra artwork beyond the trim edge. This helps prevent an unintended white strip after trimming.
Which file details help avoid artwork problems?
A high-resolution PDF can preserve your layout, fonts and image quality for print review. Before sending it, check the final dimensions, image resolution, font handling and colour profile. Review the file at its actual page size, not only as a zoomed-out preview. Include crop marks only when your artwork setup requires them. Crop marks show where a sheet should be trimmed and aren’t needed on every file.
Pre-flight file checks are a technical review of resolution, colour profile, fonts and bleed that helps identify file problems before production. This review can flag low-resolution images, missing or substituted fonts, a mismatched colour profile or missing bleed where the design reaches an edge.
How should you handle colour and edge-to-edge artwork?
Plan bleed only for elements that extend to the edge of the finished graphic. Extend background colours or images beyond the trim edge, while keeping key text and logos inside the final dimensions. If your design has no edge-to-edge elements, bleed may not apply. The print bleed technical guide explains how to prepare it.
Screen brightness and display settings affect how you see colour, so treat your monitor as a preview, not a guaranteed print reference. Check that the artwork uses the intended print colour profile and that critical details remain clear. For a smoother handoff, send the approved dimensions with the final PDF and note any specific colour or edge requirements. London City Print’s window graphic printing information accompanies its production services.
Move from approved artwork to window decal production in London
Once you’ve approved the design, send the final artwork file with one clear production brief. This creates a practical handoff from file review to print preparation and collection planning. For window decal printing london, include the quantity, final dimensions, orientation and required completion date. Production timing depends on the project, so share your deadline early rather than assuming a standard turnaround.
What information belongs in a window decal production brief?
Bring the production details together in one message or document. Include the usable glass dimensions, intended placement and viewing side, then attach the approved artwork. State when you need the finished print and note any handling or collection constraints that could affect planning. Clear information helps the print team review the job and identify questions before production begins.
- Quantity and size: State how many graphics you need and the final width and height of each one.
- Orientation and placement: Specify portrait or landscape orientation and where each graphic belongs.
- Viewing direction: Confirm which side people should read the graphic from.
- Artwork and deadline: Attach the approved file and give the required completion date.
- Constraints and preferences: Separate fixed requirements from details that can still change.
For example, treat final dimensions and the required date as confirmed requirements. If a preferred collection time can move, label it as a preference. This distinction helps the team focus on what the job must meet.
How can London businesses keep print production on track?
Approve the dimensions and artwork before production. Late changes can trigger another review and affect the schedule, so gather feedback from relevant decision-makers before sending the final file. Keep one approved version in a clear location and name it plainly, such as “shopfront-window-final”, instead of sending several similarly named files.
A reliable handoff follows a straightforward sequence:
- Send the final brief with quantity, dimensions, orientation and deadline.
- Provide the matching artwork file and identify it as the approved version.
- Respond promptly if the team needs clarification during file review and print preparation.
- Plan collection around the agreed completion arrangements.
London City Print’s facility near the British Museum gives Central London businesses a local point for production planning. The team also provides professional printing services in London for work beyond window graphics. Its window graphics information sits alongside these commercial print services.
Order window decal printing in London with London City Print
A well-organised order helps your window graphic move through production with fewer avoidable hold-ups. Make sure the person approving the design has signed off on the final version and that everyone involved is working from the same instructions. If your project has a fixed completion date, include it early so the team can plan the production handoff around your schedule.
What to include when you request window decal printing
Use one order brief to connect your design decisions with the production requirements. Alongside the approved artwork, state the quantity, intended use and any details that could affect handling or collection. Keep essential requirements separate from optional preferences so the team can prioritise what must stay unchanged.
- Purpose: Describe what the graphic needs to do for your business.
- Final artwork: Identify the approved file and make clear that it replaces earlier versions.
- Order details: State the quantity, orientation and final dimensions for each graphic.
- Timing and collection: Give the required completion date and note relevant handling or collection considerations.
This is especially useful when several colleagues contribute to the project. Assign one person to confirm the final artwork and brief, then route any changes through that person. A clear approval point reduces the risk of conflicting instructions reaching production.
Why work with a Central London print specialist?
London City Print produces vinyl window graphics alongside a wider range of commercial print work. If your window project is part of a larger campaign, you can coordinate it with other printed materials. Keep each item’s specifications distinct and show how the pieces relate, for example by using a shared campaign name or artwork version.
London City Print also provides professional printing services in London for broader commercial requirements. Across any print order, use one approved file, identify the decision-maker and communicate changes promptly. These steps help keep your project organised from approval through production planning.
Prepare your requirements and discuss your window decal printing project with London City Print. A focused brief gives the team a clear starting point for your graphic.
Make your next window graphic work harder
Plan for what happens after your graphic is in place. Choose a review point that fits your campaign or business calendar, then decide who will check that the message still reflects your current services, opening details or priorities. This helps you spot when a graphic needs an update instead of leaving outdated information on the glass.
With a clear purpose and prepared brief, you’re ready to move your window decal printing london project forward. Bring your artwork and project requirements together, then discuss your window decal printing project with London City Print.
Frequently Asked Questions
Can window decals be applied to the inside of a shop window?
Yes, you can plan a decal for inside-facing glass, but the artwork must suit the direction people will read it from. Tell your printer whether the audience is indoors or outdoors, and note if the layout needs a different orientation to read correctly through the pane. Include this information in your brief, along with any existing coatings or graphics that could affect the planned placement.
Are window decals suitable for every type of glass?
No single decal specification suits every glass surface. The pane’s condition and features, such as texture, coating or existing graphics, can affect whether the planned application is appropriate. Describe the window accurately before production, including any damage or residue that may affect the surface. If a shopfront has different types of glass, identify which pane will carry the graphic so the brief reflects the actual location.
How should I clean a window before applying a decal?
Follow the application guidance provided for the specific decal and glass. The surface generally needs to be clean and dry, without dust or residue, but the right cleaning method depends on the materials involved. Avoid applying a graphic over moisture, dirt or an obstruction. Plan cleaning before the fitting date, and allow the pane to dry as directed before application.
Can window decals include text, logos and full-colour artwork?
Yes, a window graphic can combine text, a logo and full-colour campaign artwork. Decide which element should lead, then use the others to support that message rather than compete with it. Before approval, check names, web addresses, opening details and other business information carefully. Correcting a typo in the final file is easier than discovering it after the graphic has been printed.
How long do printed window decals last?
There isn’t one reliable lifespan figure for every window decal. Exposure, the glass surface, the graphic specification, cleaning and application conditions all affect how it holds up. If you’re planning a short campaign or a longer-term business message, state the intended display period and window location in your brief. That context helps the production discussion focus on your project rather than a generic estimate.
Can I order window decals in custom dimensions?
Yes, you can specify custom dimensions to suit the available glass. For a shopfront with several panes, label each pane and pair its width and height with the intended graphic, rather than sending one measurement for the whole frontage. Record the orientation and note frames, handles or other features that limit placement. Keep the units consistent across the measurements, artwork and production brief.
Do window decals block natural light?
The effect on light and visibility depends on how much of the glass the design covers and on the graphic specification. If daylight or a clear view matters, state that before the layout is finalised. For example, a business may want a campaign message while keeping sightlines into the shop. Describe which areas should remain visually open so the design can reflect that priority.