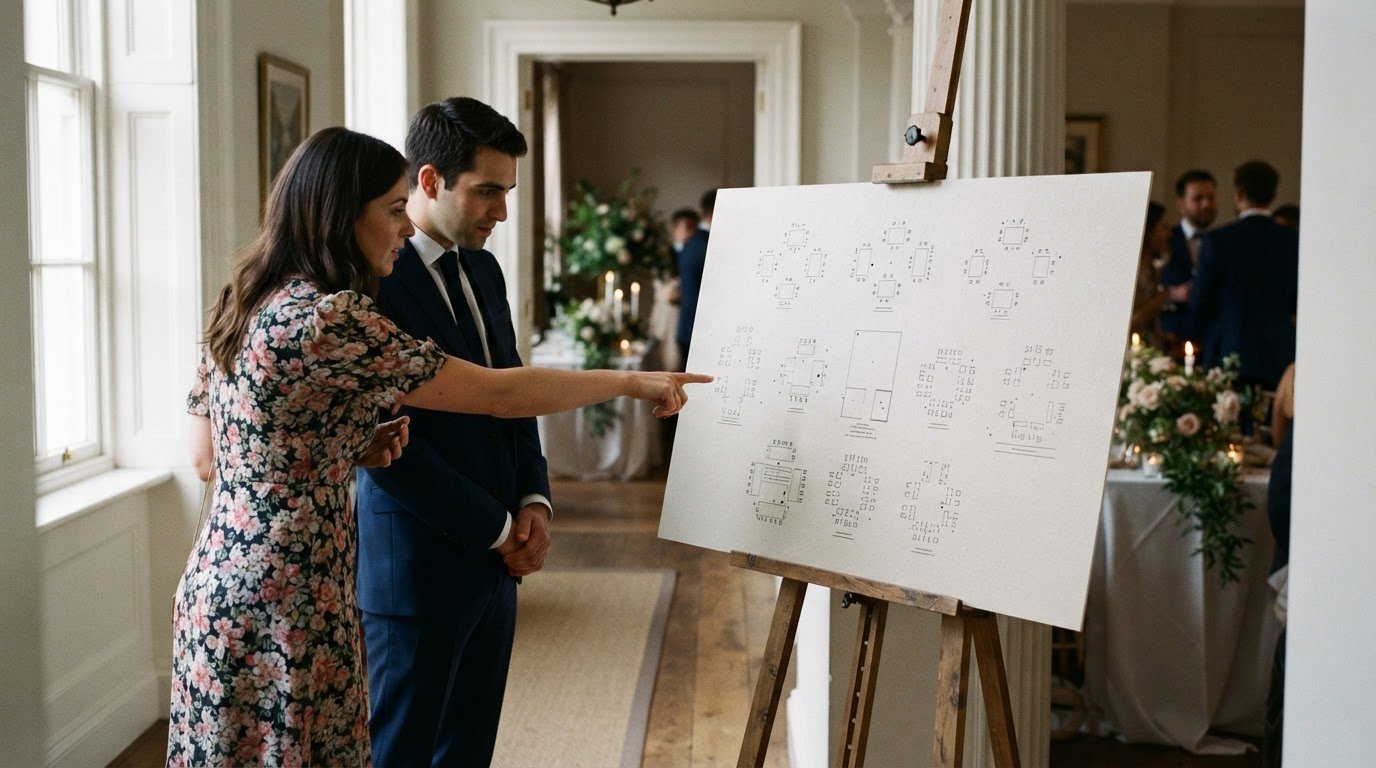
A seating plan succeeds when guests can find their names and tables at a glance. With wedding table plan printing in A1, you can present the seating arrangement as a single display, grouping guest names clearly beneath their assigned tables. The board can be designed in portrait or landscape, depending on how your content fits and where you plan to display it.
You already know the plan needs to be easy to read on the day. Choosing the right orientation, spacing and layout keeps names legible and helps guests find their tables without confusion.
This guide explains what a wedding table plan does, how to choose between portrait and landscape, and what to consider when preparing the artwork for A1 printing. You’ll also learn how the print process works and which details help the finished display communicate the seating arrangement clearly.
From organising names and table headings to preparing a print-ready file, each decision contributes to a clear result. The following sections guide you through the choices in order, so you can plan the format with confidence.
Key Takeaways
- Understand how a table plan helps guests find their assigned tables and why a clear layout matters.
- Choose portrait or landscape by considering your name lists, table headings and display space.
- See how the board’s size and orientation affect the space available for readable names and table details.
- Learn which artwork and print-preparation choices help produce a clean, legible seating display.
- Get a clearer picture of production and delivery timing before planning your wedding signage.
What is a Wedding Table Plan?
A wedding table plan shows guests where to sit during the reception. It groups names by table so everyone can find their place before taking a seat. For example, a heading such as “Table One” can sit above the guests assigned to it. A clear layout also helps venue staff direct guests and keeps arrivals moving smoothly. The plan is a practical sign, not a substitute for individual place cards at each setting.
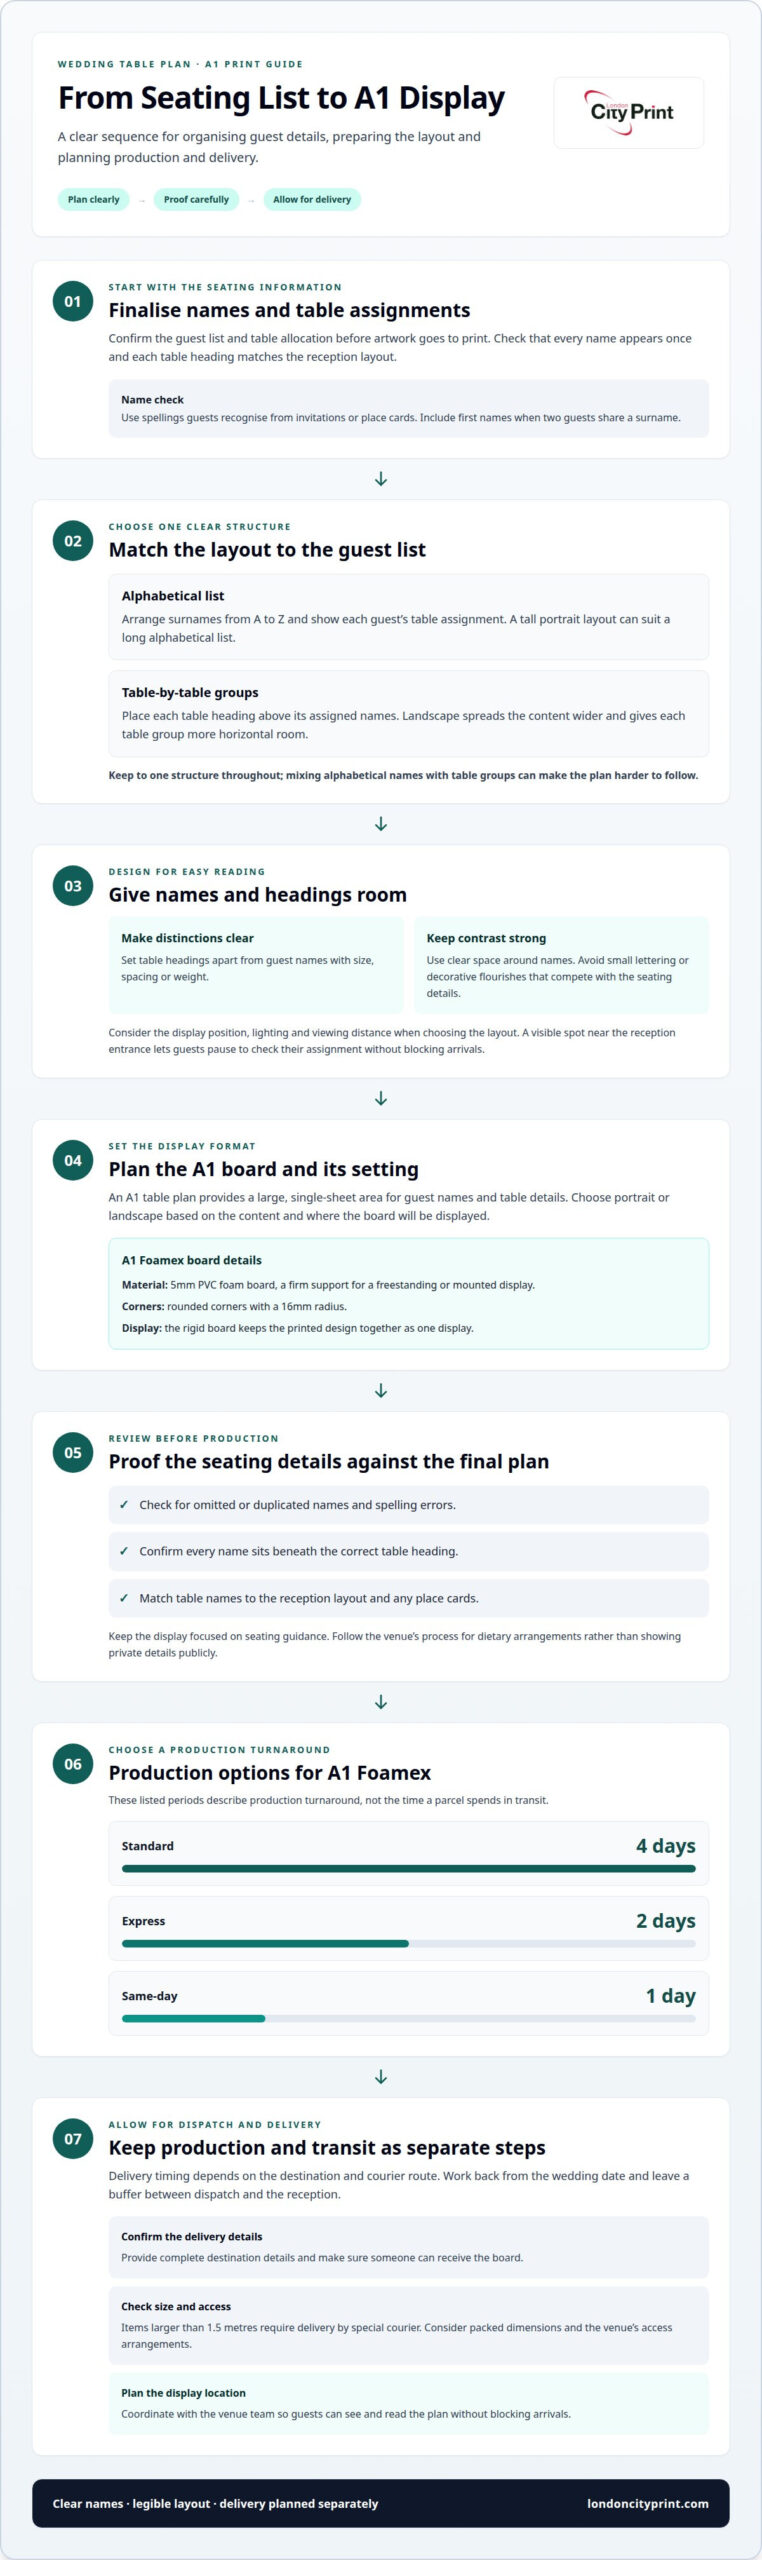
Printed as a display board, the plan needs legible names, distinct table headings and a layout guests can scan. A1 Foamex table plans are made from 5mm PVC foam board, a firm support for a freestanding or mounted display. Rounded corners on the A1 Foamex product have a 16mm radius. The board’s durable, rigid construction keeps the printed design together as one display, while a seamless layout makes the seating information easier to follow.
Production time and delivery time are separate stages. A1 Wedding Table Plan Foamex schedules list a standard turnaround of 4 days, an express turnaround of 2 days and a same-day turnaround of 1 day. These periods describe production options, not the time a parcel spends in transit. For a wedding date, work backwards from the event: allow time for the artwork, printing, dispatch and delivery before the venue setup.
- Standard: the listed production turnaround is 4 days.
- Express: the listed production turnaround is 2 days.
- Same-day: the listed turnaround is 1 day.
After production, dispatch starts the delivery stage. Delivery timing depends on the destination and the courier’s route, so keep a buffer between dispatch and the reception date. Items larger than 1.5 metres require delivery by special courier. Plan delivery around the display’s packed dimensions and the venue’s access arrangements.
For UK orders, treat dispatch and transit as separate steps when planning delivery. Check that the destination details are complete and someone can receive the board. Before sending the artwork to print, finalise the guest list and table assignments. This helps prevent late name changes from disrupting production and gives the venue one clear reference for seating guests.
Event display and guest seating guidance
Place the seating display where guests can pause before entering the dining area. A position near the reception entrance gives arriving guests a clear place to check their table assignments. Keep it visible from the approach, not hidden behind a doorway, floral arrangement or queue. If the venue has separate entrances, direct guests to the display with a simple sign or staff guidance.
Organise names so guests can scan them quickly. An alphabetical list lets guests search by surname, while a table-by-table layout groups names beneath headings such as “Table One” and “Table Two”. Choose one structure and use it throughout. Mixing alphabetical names with table groups can make the plan harder to follow, especially when guests arrive together.
- Alphabetical format: arrange surnames from A to Z, then show each guest’s table assignment.
- Table format: place each table heading above its assigned names.
- Consistent names: use the same spelling guests recognise from invitations or place cards.
- Clear headings: distinguish table names from guest names through size, spacing or weight.
For example, a guest named Alex Smith should be easy to find under “S” in an alphabetical plan. In a table-based plan, Alex’s name should appear beneath the correct table heading. Avoid decorative flourishes that compete with the names. A script font may suit the wedding style, but small lettering or low contrast can slow down scanning. Use strong contrast between text and background, and give each name clear space.
Consider the venue’s layout before finalising the display. A narrow entrance may call for a position just beyond the doorway, where guests can stop without blocking arrivals. A large reception room may need the plan near the route to the dining tables. Ask the venue team to identify the display location during setup planning. This helps you account for lighting, viewing distance and nearby décor in the design.
Keep seating details precise. If two guests share a surname, include their first names. If a table has a distinctive name, such as “Orchard”, repeat it exactly on the plan and any matching place cards. Follow the venue’s established process for dietary arrangements rather than displaying private details publicly. The plan should guide seating, not reveal information guests don’t need.
Before approving the artwork, compare the final guest list with the table assignments. Confirm that each name appears once and every table heading matches the reception layout. This final review catches misplaced guests and spelling errors before printing. A well-positioned, clearly structured display gives guests a direct route from arrival to their seats.
Every guest has a clear assignment once your wedding table plan printing A1 is finalised. A final proofread can catch omissions, duplicated names and mismatches between the display and place cards. London City Print offers various templates that suit different reception layouts, but the finished display should always remain easy to read and consistent with the seating information your guests need.
Table plan sizes and formats
A1 table plans give you a large, single-sheet area for guest names and table details. Portrait orientation creates a tall layout, which suits a long alphabetical list. Landscape orientation spreads the content across a wider space, giving each table group more horizontal room. Choose the format that supports your information clearly and fits the intended display position.
For A1 wedding table plans, the stated material is Foamex board rather than paper, available in 3mm and 5mm thicknesses. These are board thickness options, not paper weights. Set the design for the finished orientation and size, then keep headings, names and decorative elements within the intended print area.
Consider the guest list before choosing a layout. An alphabetical format gives guests one continuous list of names to scan. A table-by-table format divides the artwork into groups, with each table heading followed by its assigned guests. If names are long or the plan includes table descriptions, landscape orientation may provide more horizontal space. If the list is tall and compact, portrait orientation can use the page area efficiently.
- Portrait: suits a vertical name list or stacked table groups.
- Landscape: suits wider table columns or a design with more horizontal elements.
- Foamex thickness: select between 3mm and 5mm for the A1 board.
- Layout: keep the reading order consistent from heading to guest names.
The required artwork format is a high-resolution PDF, with fonts embedded and the page set to the final A1 orientation. Image resolution depends on the artwork and viewing distance, so use sharp source images and avoid enlarging small web graphics. Check that names remain crisp at the intended print size, rather than relying on a reduced screen preview.
Leave clear space around important text. A table heading should stand apart from guest names, and decorative borders should not crowd the list. For instance, a portrait design can place the wedding title at the top, followed by table groups down the page. A landscape design can position several groups side by side, as long as each heading stays with the correct names.
Before sending the file, confirm that the page orientation matches the approved layout. Review spelling, table assignments, font embedding and image quality in the PDF. Avoid using “fit to page” during printing, because automatic scaling can change the finished size. A final check of the A1 setup helps preserve the intended spacing and keeps the seating information easy to read.
Wedding table plan and seating chart printing
A seating chart has three practical stages: finalising the arrangement, preparing the artwork and approving the print file. Start with one authoritative guest list and match every name to a table. For example, “Jordan Lee” should appear once under the correct table, with the same spelling used on the place card. Separating content decisions from visual design reduces the chance of printing outdated assignments.
Print preparation can include layout support and an artwork review. A proof helps you assess hierarchy, spacing and legibility before production, while the approved guest list remains the reference for names and assignments.
The seating arrangement determines how much space each section needs. An alphabetical chart gives every guest one way to search; a table-by-table chart gives each group its own block. Make table headings visually distinct from guest names. You can add a restrained border, a small floral motif or wedding colours, but decorative details should not interrupt the reading order.
- Content: include the event title, table headings and guest names.
- Hierarchy: make table labels easy to distinguish from names.
- Legibility: check text contrast and spacing in the full-size layout.
- Consistency: match table names and spelling across the chart and place cards.
Before approving the chart, compare the final guest list with the seating arrangement. Confirm that every name appears once, each person is assigned to the intended table, and table labels match the venue plan. Check punctuation, accents and name order too. Misspellings can be hard to spot in a reduced preview, so inspect the artwork at a readable zoom.
Then review the print setup. Confirm the page dimensions and portrait or landscape orientation, and make sure the artwork matches the intended finished size. Check that fonts display correctly, images look sharp and important text sits clear of the edge. A high-resolution PDF preserves the layout, fonts and image quality for printing. Resolution needs depend on the source artwork and viewing distance, so avoid enlarging small, low-quality images.
Check the colours before approving the design. A screen preview and a printed surface can show colour differently, so review a proof for overall balance. Make sure dark text remains readable against its background and similar table colours are easy to distinguish. These checks keep seating information clear without letting decorative elements overpower the names.
Once the proof matches the approved list and layout, the artwork is ready for production. Clearly identify the final version, especially if you’ve revised names or table assignments during planning. This simple version-control step helps prevent an earlier seating chart from being mistaken for the approved print file.
Compare the option with your production schedule.
What are the dimensions of A1 wedding table plan printing?
A1 is a standard sheet format, and its orientation determines which edge runs across the top. Portrait turns the sheet vertically; landscape turns the same sheet horizontally. The printable area remains the same size, but its shape changes in relation to your names, headings and artwork. Set the document to A1 before arranging the seating information, rather than resizing a smaller design afterwards.
For an accurate finished size, build the artwork on an A1 page in your design software or use an A1 print template. Set portrait or landscape to match the approved layout. Keep the page dimensions consistent from the original file through export, and don’t change them when saving the final PDF. This makes the intended output clear and helps avoid accidental scaling during print preparation.
Orientation affects how you use the available space. A portrait plan creates a tall reading path, which can suit a long list arranged in one column. A landscape plan offers a wider layout, useful when table groups sit side by side. For example, a design with several table headings across the top may work better in landscape. A single alphabetical list may read naturally in portrait.
Plan the content within the A1 page area. Keep the event title separate from table headings, then give guest names enough room to remain distinct. Leave a clear margin around text and important design details. If a border or background colour reaches the edge, include the required bleed in the artwork setup. Keep names and headings inside the trim area so trimming won’t affect essential information.
- Set the page: choose A1 and the intended orientation before placing content.
- Arrange the information: group names into columns or table sections that suit the page shape.
- Protect key details: keep names, headings and dates away from the trim edge.
- Export carefully: save a high-resolution PDF without changing the page size.
Before approval, inspect the PDF’s page properties and confirm that its dimensions match the selected A1 setup. Check that the artwork hasn’t shifted, that no text sits outside the page, and that decorative elements don’t crowd guest names. A screen preview can make text appear larger than it will on the full-size board, so review the design at a realistic scale whenever possible.
The board’s thickness is a separate specification from its face dimensions. A1 table plans can use Foamex board in 3mm or 5mm thicknesses, while the page orientation controls the layout. Keep those choices distinct in your production details. For A1 wedding table plan printing, prepare the artwork with the intended page format, orientation and finished board requirements clearly defined.
London City Print: Wedding Stationary
London City Print provides Wedding Stationary for couples preparing printed details for their celebration. If your seating plan is ready for production, its A1 format and portrait or landscape layout can guide the print setup. Foam Board Printing offers a suitable route for presenting the plan as a display board, while matching wedding print materials can help keep event information consistent.
Prepare the approved guest list, table assignments and final artwork before printing. Include the intended page orientation and board requirements in your print details. This gives the job a clear specification and helps keep the seating information aligned with your event plan.
Contact London City Print to discuss your wedding stationery and table plan printing requirements.
Prepare your wedding print for the next step
Use the approved seating artwork as the starting point for coordinating the rest of your wedding print. A consistent visual style across the table plan, invitations and other event materials can help each piece feel connected. Keep the final names and table assignments with the artwork so the production details stay aligned.
For wedding table plan printing at A1, bring the finished layout and orientation into the production conversation. London City Print also offers Booklets and Brochures, Posters and Wire Binding for other printed items that support your event. You can discuss the pieces you need and how they fit your wedding stationery plans.
Contact London City Print about your wedding print and take the next step towards preparing your event materials. A clear plan and coordinated print can help you approach the celebration with confidence.
Frequently Asked Questions
What are the common Sizes for Table Plans?
A1 is a suitable choice for a prominent shared seating display, while smaller formats can work for compact venues or shorter guest lists. Choose by considering how much information the plan contains and where guests will read it. A larger sheet gives the design more room, while a smaller one takes up less display space. Match the finished format to the venue’s setup and the amount of content.
How should guest names and table assignments be arranged on an A1 seating plan?
Give each guest a clear name-and-assignment entry, and use the same format throughout the plan. For couples, decide whether to list both names on one line or separately, then apply that choice consistently. Replace temporary labels such as “plus one” with the guest’s name before approving the artwork. Keep the final file aligned with the latest seating list so planning changes don’t leave outdated entries.
What are the pros and cons of printing an A1 seating chart versus smaller sizes?
An A1 chart offers more space to separate information and include design details without crowding the layout. It can suit a shared display where guests need to read names at a glance. Its larger footprint can be inconvenient in a tight entrance or venue with limited display space. A smaller chart is easier to position, but may require tighter spacing or simpler decoration to keep names clear.
What paper and finish options are available for A1 wedding table plans?
A1 wedding table plans are printed directly onto Foamex board, available in 3mm or 5mm thickness.