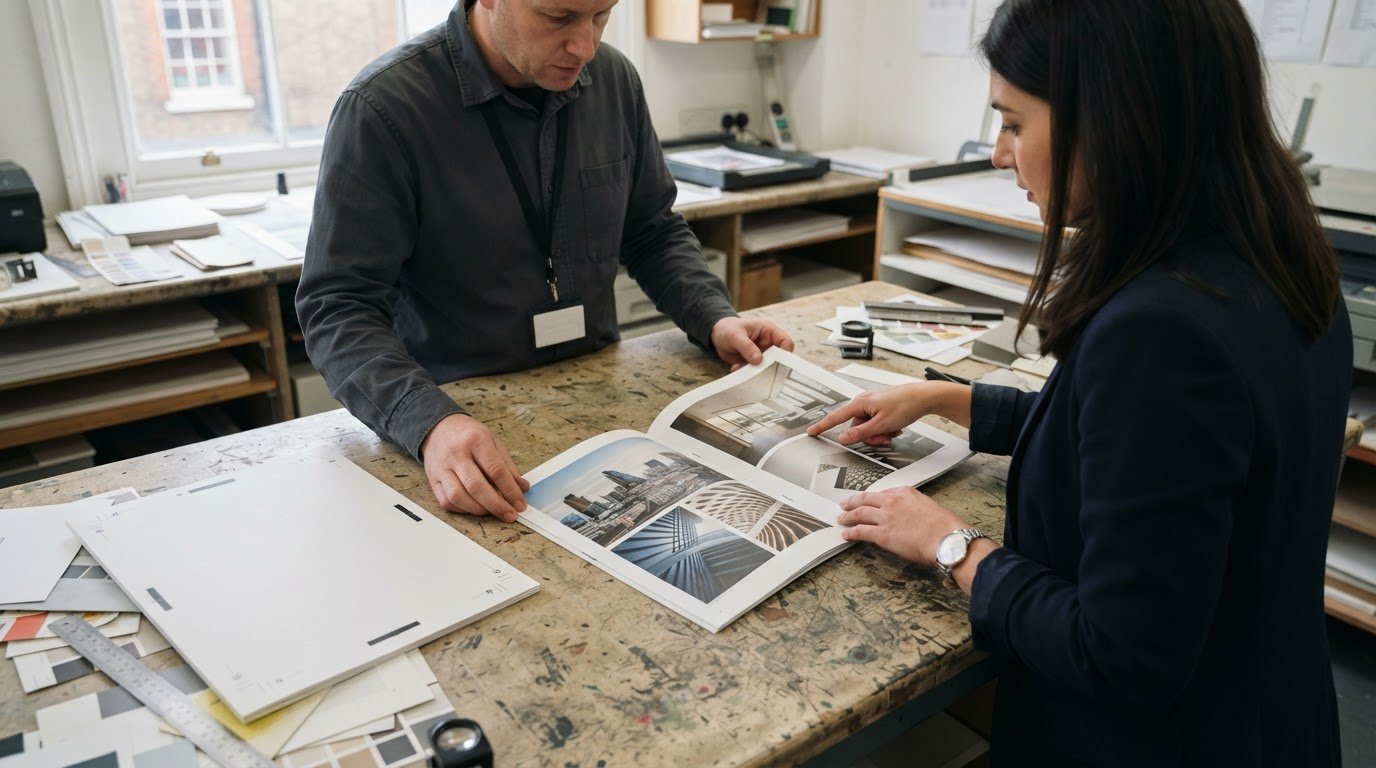
A screen preview cannot show every detail that matters on paper. A reliable proofing process for professional printing combines digital review with a printed sample when you need to assess readability, image reproduction, paper, or finish before production.
Proofing helps catch content and layout issues before they reach print. Each method serves a different purpose: a PDF is useful for reviewing text and page order, while a hard proof lets you examine the design on paper. Neither guarantees a perfect printed-colour match, which also depends on the proofing method and viewing conditions.
This guide explains what print proofing involves, how to order a hard proof, and how to review typography, image placement, page format, and bleeds. You’ll also learn how digital and press proofs differ, helping you choose the right review method and approve files with greater confidence.
Key Takeaways
- Choose a PDF, digital preview, or physical proof based on whether you need to assess content, layout, paper, finish, or colour.
- Request a hard proof when seeing the design on paper will help you assess readability, image reproduction, and the finished appearance.
- Review typography, pagination, image placement, spelling, and content accuracy before approving files for production.
- Check page dimensions and image resolution, and make sure bleed extends beyond the trim edge wherever artwork runs to the edge.
- Match the proofing method to the print job, including stationery, brochures, and display materials, so your review focuses on the details that matter.
What is Proofing in Printing?
The proofing process for professional printing checks content, layout, colour, and finishing details before production. It lets you compare the intended design with a proof before approving the printed piece.
Color Management Across Print Conditions
Colour management coordinates devices and print conditions to keep colour representation consistent. It matters because screens, paper, ink, and finishes can each affect the final appearance.
A photograph may look different on coated and uncoated paper, even when the printer uses the same file. A glossy finish can also change how colours appear under light. For critical brand colours, assess the proof under suitable lighting and consider the actual stock and finish. This gives you a more relevant production reference than a screen preview alone.
Physical Proofs for Color Review
A physical proof is a printed sample that lets you assess colour and image reproduction on paper. It is especially useful when colour accuracy or the tactile appearance of the stock matters.
Review the sample for colour balance, image detail, readability, and how the stock handles dark areas. A professional proofing device can indicate printed colour more reliably than an ordinary screen preview. However, a proof represents only the conditions that the printer used to make it. If the production stock or finish differs, the final piece may look different. Treat the sample as a practical reference, not a promise of an exact match.
Screen and Print Color Differences
Screens create colours with RGB light, while printed materials use CMYK inks or toners. This matters because some bright screen colours cannot be reproduced exactly in print.
A calibrated monitor makes on-screen review more consistent, but cannot make screen and print colours identical. Ambient lighting also affects how you perceive a display and a physical proof. Use a PDF to inspect layout, text, and page order; use a printed sample to judge paper appearance and colour reproduction. A wide-gamut monitor may display colours beyond the printer’s range, making the screen look more saturated than the final printed piece.
Approval Responsibilities and Requirements
Proof approval records acceptance of the version presented, so inspect content and layout before approving it. If an error is clearly visible in the approved proof, correcting it later may be difficult. Responsibility depends on the agreed terms and whether production matches the approved version. Keep the approved proof and file version together for reference if questions arise.
Printing requirements do not call for one proofing step for every project. The review method and requirements depend on the job and its agreed production specifications. Before approval, agree on what the proof covers, including content, colour, and finishing. This clarity helps distinguish an approved design issue from a production difference.
How do I order a hard proof?
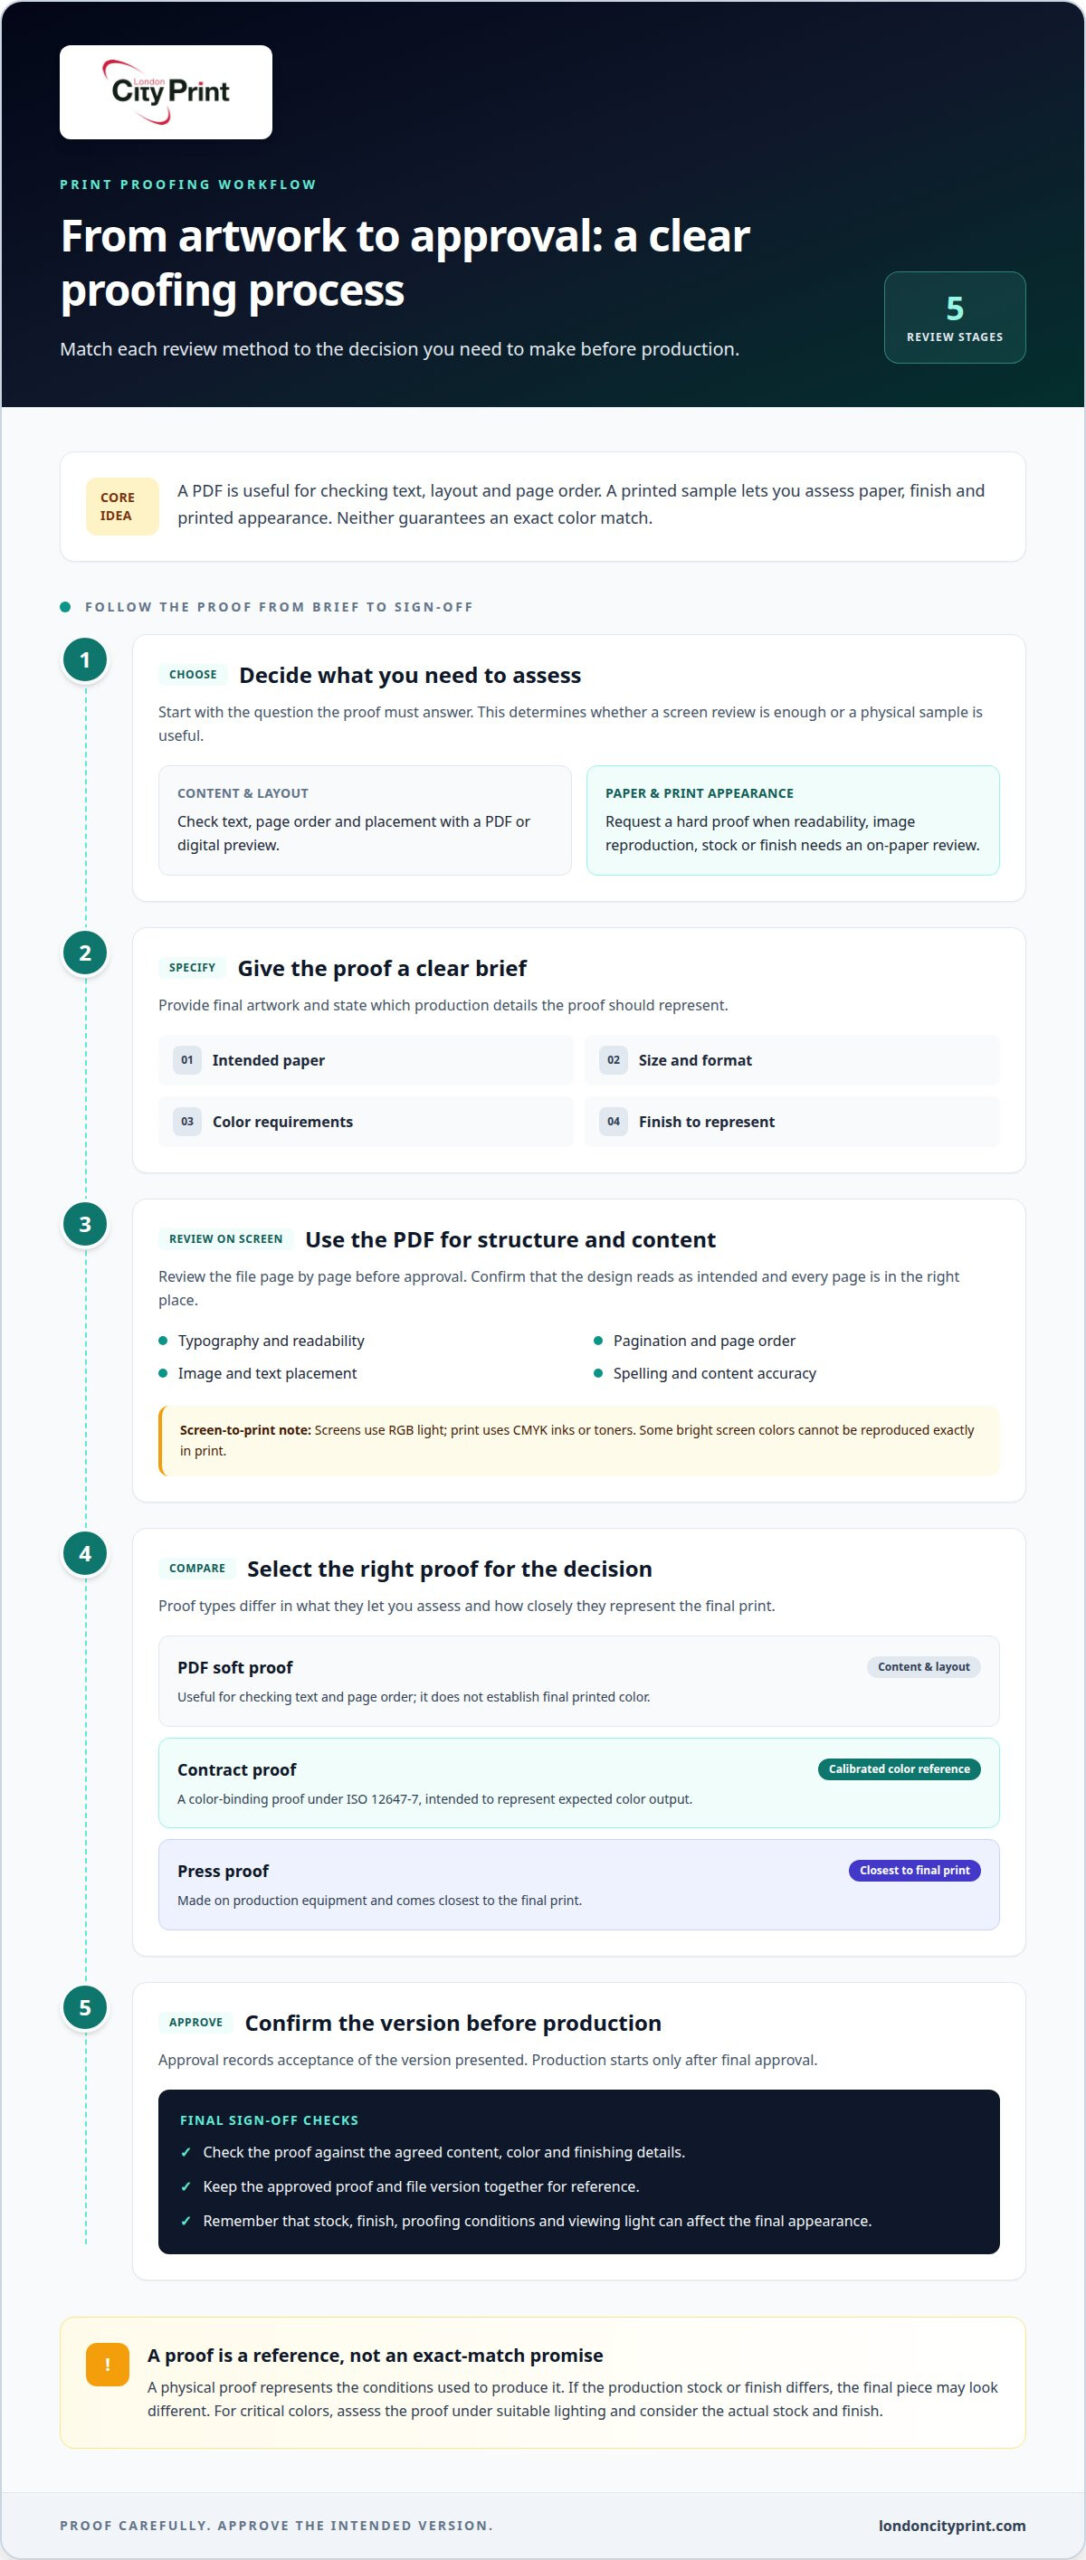
Choose a proof type based on what you need to review: content, layout, colour, or physical stock and finish. The proofing process for professional printing works best when you provide final artwork and specify which production details the sample should represent.
Hard Proof and Sample Options
A hard proof is a physical print sample that lets you inspect the design on paper. It matters when a screen preview cannot show the stock, ink finish, or printed appearance you need to assess.
Provide the final artwork and specify the intended paper, size, colour requirements, and finish. A hardcopy proof lets you review readability, image reproduction, and overall appearance. A contract proof is a colour-binding proof under ISO 12647-7, intended to represent expected colour output. In the proofing workflow, identify the sample as a pre-production reference and state which materials or finishing details it should represent.
Proof Accuracy and Cost
Digital, contract, and press proofs differ in how closely they represent the final print. Understanding the distinction helps you decide whether a screen preview is enough or physical colour review is necessary.
A PDF soft proof helps you check content and layout, but does not establish final printed colour. A contract proof provides a calibrated colour reference, while a press proof uses production equipment and comes closest to the final print. Proof requirements depend on format, stock, finish, and whether you need a physical sample. The proofing process for professional printing should match the sample to the decision you need to make, rather than adding review steps that do not help.
Proofing Time Before Press
Proofing time includes sample preparation, delivery if needed, review, and corrections. Production starts only after final approval, so plan for each step.
A digital preview can be reviewed without physical shipping. A hard proof requires printing and may need delivery, extending the schedule. Reviewer response times and requested changes also affect production readiness. Keep the workflow moving by submitting finished artwork, identifying the proof type, and consolidating feedback before approval. Late text or layout changes may require another review cycle, so allow time for that possibility when planning the proofing process for professional printing.
Reviewing typography, image placement, and text placement
Start with the layout proof and confirm that every page appears in the intended order. Compare the first and last pages, then scan the pagination for missing, duplicated, or misplaced pages. Check that headings, captions, and body text sit in the right places. A page-by-page review helps catch layout shifts before production, especially in files containing spreads or several content sections.
Inspect typography at normal reading size, then zoom to at least 100% to examine small text and fine details. Look for font substitutions, inconsistent styles, cramped spacing, and text that sits too close to the trim edge. Read every word aloud to catch omissions or awkward breaks. For a brochure, check that a heading stays with its intended paragraph and that captions clearly match their images.
Review each image for placement, crop, sharpness, and reproduction. Confirm that photographs sit beside the correct text and that logos retain their proportions. Inspect fine lines and small details closely, as they can become difficult to read in print. A calibrated monitor helps you assess image content consistently, but cannot guarantee an exact printed-colour match. Use a physical proof when the printed appearance is critical.
Set up your monitor in the lighting conditions where you normally review files. Ambient light affects how you perceive screen brightness and colour, so avoid comparing a bright display with a proof viewed under very different lighting. A colour-managed workflow uses a calibrated monitor and suitable viewing conditions. This makes image review more consistent, while the final stock and finish can still affect the printed result.
Give another reviewer a clear version of the proof and ask them to check text placement, pagination, and readability independently. Fresh eyes may catch errors the original reviewer missed. Record corrections against specific pages and elements, such as “page four, caption under the product image,” rather than sending general notes. Review the revised proof again, focusing on changed pages and confirming the layout remains intact throughout the document.
Checking hyphenation, line arrangement, page format, and bleeds
A print proof review checks both the words and the file setup. The professional printing proofing process moves from prepress checks to proof review, corrections, and approval of the final version for production.
Start with the text. Check headings, body copy, captions, and contact details for spelling, grammar, punctuation, and accuracy. Verify names, dates, product descriptions, and phone numbers against the approved copy. Review hyphenation and line breaks too. A hyphen can split a word awkwardly, while a short final line may leave a paragraph looking unbalanced. Check each change in context, since correcting one line can shift text elsewhere.
Next, compare the document’s page format with the project specification. Confirm page dimensions, orientation, page order, and whether the file uses single pages or spreads. Look for content placed too close to the trim edge. Crop marks should show where the printer will trim the sheet to its final size, not appear in the finished design.
Check image size and resolution at the intended print dimensions. Enlarging a small image can reduce its sharpness, so inspect fine details, logos, and text embedded in graphics. Large-format printing specialists like Image Square Printing advise checking graphic files at full production scale to catch pixelation or loss of detail early. Confirm each image appears on the correct page and supports the nearby content. A screen preview can reveal placement issues, but may not show how clearly fine details will reproduce on paper.
For artwork that reaches the paper edge, confirm the bleed extends beyond the final trim size. This extra image area helps prevent a thin unprinted strip if trimming shifts slightly. Background colours and photographs should continue through the bleed, while important text and logos stay inside the trim area. Check the trim and bleed boundaries in the page setup, then confirm the proof displays both correctly.
Record corrections by page and element, such as “page three, heading hyphenation.” Check the amended proof for accuracy before approval. Production begins once you approve the final proof, so resolve text, format, and bleed issues first.
Analog and digital proofing methods
Digital proofs speed up early review, while physical proofs show how the output looks on paper. Match the method to the approval decision: layout, colour accuracy, or production conditions.
Analog Proofing Methods
Analog proofing uses a physical print to assess a job’s appearance. It is useful when the stock, finish, or production output affects the decision. A hardcopy proof gives reviewers a tangible reference, while a press proof uses production equipment to represent the final print more closely. Press proofs suit colour-sensitive covers, art-heavy publications, and other high-risk work.
Press proofs can produce short runs of 50 or 100 copies, according to Wikimedia Foundation. This can make them useful when you need both a physical colour reference and a limited quantity of printed pieces. Reserve press proofs for cases where production conditions matter to approval.
Digital Proofing Methods
Digital proofing creates a preview from digital data without an intermediate printing form. It lets you review content and layout before committing to a physical proof. A soft proof typically shows a PDF on a calibrated monitor and helps you catch placement and file errors. It can simulate some print conditions, but cannot reproduce the tactile feel of the stock.
A validation print is a physical digital proof with higher colour tolerances than a contract proof and no legal binding effect. A contract proof can use a calibrated inkjet device to simulate final output colours. Choose a soft proof for early layout approval, then a contract or press proof when colour matching is critical. Each method answers a different question.
Keep the workflow staged. Use digital review to resolve text, image placement, and file setup issues first. Move to a physical proof when the paper, finish, or colour needs direct assessment. For colour-sensitive work, align the proofing device and printer through colour management, then compare the sample under suitable viewing conditions. The right proof reduces avoidable revision cycles and gives production teams a clear approval reference.
Proofing business stationery, brochures and urgent print jobs
Proofing priorities vary with the format and deadline. For business stationery, brochures, business cards, and display graphics, review the details that affect use, readability, and production before approving the file.
For business stationery and business cards, check names, job titles, phone numbers, email addresses, and logo placement. Confirm front and back designs have the correct orientation and that key text is clear at finished size. Small contact details may look readable on screen but be difficult to read on a printed card. For business cards in one hour, prepare final artwork and consolidated corrections before production begins. A last-minute text change still needs review.
Brochures need a different review. Check panel order, fold positions, page sequence, captions, and whether images align with the correct product descriptions. For a company or product brochure, review the cover and back panel alongside the inside pages. This helps catch mismatched content and layout changes throughout the document. Confirm the chosen paper and finish in the proof specification, as they affect the final appearance.
Urgent and overnight print jobs leave less time for repeated revisions. Assign a clear approval owner, collect feedback in one round, and return corrections against specific pages or panels. A delivery-to-stand schedule also depends on the approved file being production-ready and you clearly identifying finished items for their destination. Do not treat an early preview as final approval.
For roller banners or pop-up display artwork, check the full visible area, orientation, final dimensions, and placement of logos and essential text. Keep important content clear of areas that hardware may conceal. Commercial signage specialists like Signarama recommend reviewing the design at its intended viewing distance, then inspecting fine text and image details up close. If the display has several panels, check that colours and artwork align across the joins.
Before approval, confirm that the latest file version, requested quantity, format, and finishing details match the job specification. This focused review helps prevent avoidable corrections from disrupting a tight schedule without skipping checks that protect accuracy.
London City Print
London City Print is a practical next step when your approved artwork needs to become a finished printed item. The proofing checks in this guide help you prepare files and decisions for print, from page sequence and trim details to colour, paper, and finishing.
For multi-page documents, Booklets and Brochures bring company or product information into a structured format. Before approving the artwork, check the cover, page order, image placement, and any text crossing a fold or spread. If the document needs to lie flat for reference or presentation, Wire Binding is an available finishing option. Consider how the binding affects the layout, and keep important text clear of the binding edge.
Posters and Roller Banners serve a different purpose: communicating at a distance. Review the design at its intended display size, paying particular attention to headline legibility, image sharpness, orientation, and essential details. For a roller banner, keep key content within the visible area and account for the base concealing part of the banner. These checks help ensure the artwork suits how people will view the finished display.
A clear approval workflow supports reliable production. Keep the final artwork, proof comments, selected format, and finishing requirements together. Identify corrections by page or design element, then confirm the latest proof reflects those changes before approval. This is especially useful for projects with several formats, such as a brochure supported by posters or roller banners, because shared colours and brand elements should remain consistent.
Choose a printed format that suits your communication needs, then prepare the artwork and approval details for that item. London City Print offers Booklets and Brochures, Posters, Wire Binding, and Roller Banners for a range of business print requirements. A focused review of the final design helps keep production decisions clear and the finished piece suited to its intended use.
Contact London City Print to discuss your print project and the format that suits it.
Frequently Asked Questions
Can I choose “No Proof Needed”?
Choosing “No Proof Needed” means proceeding without a proof review, if that option appears in your ordering workflow. Before selecting it, make sure the file is final and no edits remain. This option suits artwork you have already approved and do not need to revise. For new layouts, changed contact details, or unfamiliar formats, keep a review stage to catch mistakes before production.
What Types of Proof Are There?
Proof options include digital previews, layout proofs, hardcopy proofs, contract proofs, and press proofs. To choose one, identify the decision you need to make: confirm page order, review physical stock, or assess colour against a reference. For example, a multi-page document with an approved design may need a layout-focused review, while a colour-sensitive cover may need a physical reference. Let the purpose guide your choice.
What happens if I find an error?
Pause approval and report the correction with its exact location and replacement text or artwork. For example, identify the page and line containing an incorrect date, then provide the approved date. Keep comments tied to one current file version so the production team can apply the right changes. Once the team incorporates corrections, review the revised areas and confirm they have addressed your feedback before you give final approval.
Why is Proofing Necessary?
Proofing creates a clear decision point between preparing artwork and authorising production. It lets you confirm that the file represents the version your organisation intends to distribute. This is useful when several people contribute copy, design, or product information. A named approver and clearly identified final version help prevent conflicting edits from entering production.
Will colors look exactly the same in print as they do on screen?
An exact screen-to-print match is not guaranteed. If a specific brand colour matters, include its Pantone specification or request a sample on the intended paper stock for comparison. Review colour under lighting similar to the setting where you will use the printed item. This provides a practical reference for approval and helps distinguish an acceptable production variation from a colour that needs further discussion.
What is a print proof, and what types of proofs are available?
A print proof is a review version of a print job that lets you assess it before production. Options include digital and printed proofs, with contract and press proofs used for particular colour or production checks. Before reviewing, confirm the proof identifies the correct job and artwork version. This simple record keeps feedback, revisions, and approval tied to the intended file.
What is the difference between a soft proof and a hard-copy proof?
The key practical difference is how you review and share feedback. A soft proof can be circulated electronically, making it useful when reviewers are in separate locations. A hardcopy proof gives reviewers a physical reference they can annotate together. For either format, collect comments in one place and identify the relevant page or design element to make revisions clear.
What should you check on a proof before approving it for printing?
Confirm that the proof shows the latest revision and that every requested change appears in the right place. Check variable details, such as dates, names, product codes, or versions, against the approved project information. For a document used across a team, verify that its final title and version are clear to readers. These checks help prevent an outdated or mismatched file from receiving approval.