
A clear event schedule helps guests know where to be, what happens next and when. But deciding what to include, whether one card is enough and how to prepare the artwork takes planning. Order of the day printing works best when the content and format match the event, so guests can find key information at a glance.
This guide explains how to plan a readable schedule, choose between a single card and a multi-page format, and prepare print-ready artwork. You’ll find practical checks for colour mode, image resolution and bleed, plus ways to keep approvals moving. With the schedule confirmed and the print brief prepared, you can reduce last-minute changes and move confidently towards production.
Key Takeaways
- Use an order of the day to help guests follow key timings, event moments and practical transitions.
- Choose a single card or multi-page format according to how much information guests need and where they’ll read it.
- Choose paper, colour and finish together so the schedule stays clear and suits the event.
- Keep order of the day printing on track by confirming the schedule, preparing high-resolution artwork and allowing time for pre-flight file checks.
- Bring your event details, chosen format and approved artwork together in a clear print brief.
What Is Order of the Day Printing, and What Should Guests Learn?
An order of the day is a printed guide to an event’s sequence and approximate timings. It helps guests understand what happens next, where to go and when they may need to move between activities. For a wedding, it might cover the ceremony, reception, meal and speeches. At a business event, it could list presentations, breaks and networking sessions.
A concise schedule gives guests, event teams and venue staff a shared reference. Guests can follow the day without relying on memory, while coordinators can use the same sequence to keep activities aligned. Good order of the day printing puts practical information first and makes each activity easy to scan.
What information belongs on an order of the day?
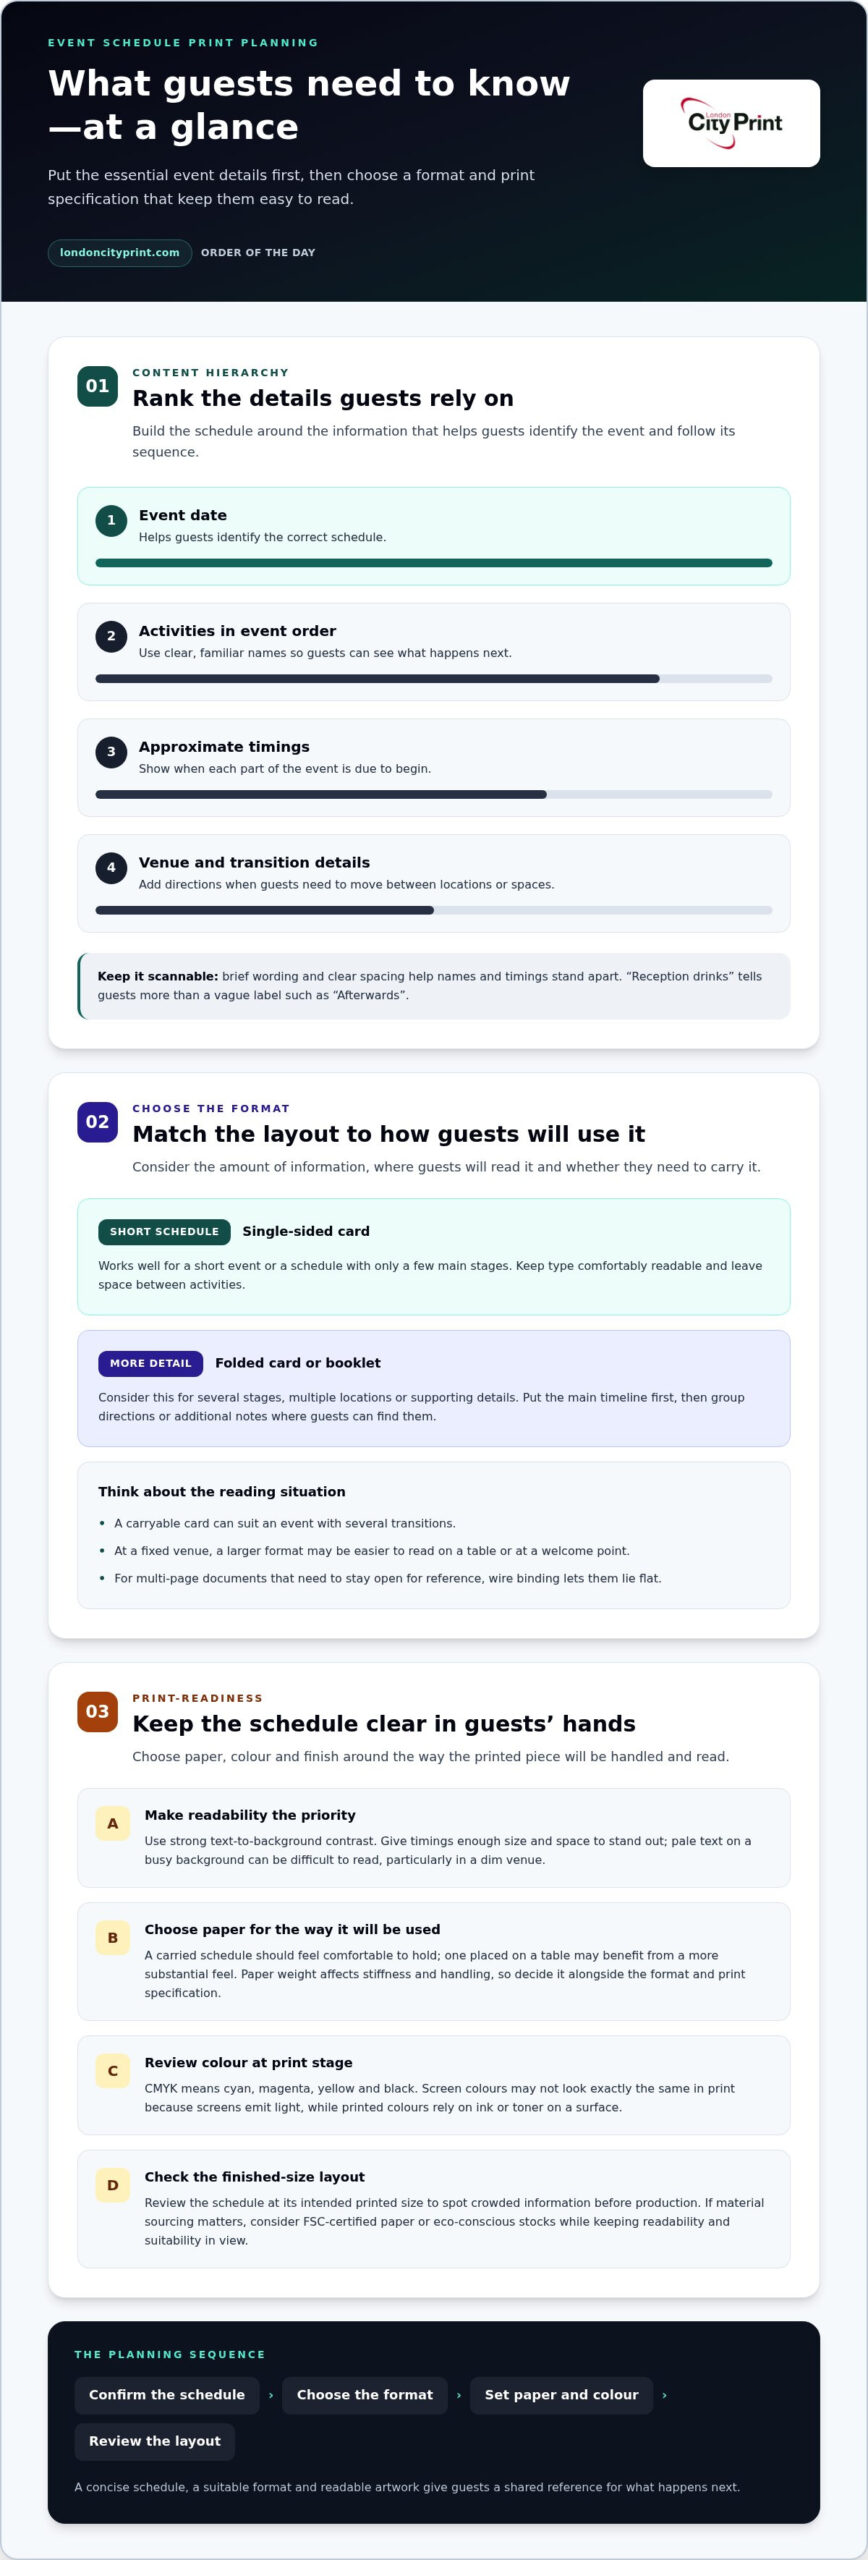
Build the schedule around the details guests need to follow the event. Prioritise:
- The event date, so guests can identify the correct schedule.
- Activities in the order they will happen, using clear, familiar names.
- Approximate timings, so guests know when each part is due to begin.
- Venue or transition details, if guests need directions between locations or spaces.
Keep the wording brief and make the sequence easy to scan. For example, “Reception drinks” tells guests more than a vague label such as “Afterwards”. Add personal messages or supporting details only after the essential schedule is clear. A short introduction can set the tone, but it shouldn’t compete with the timeline.
How is it different from an order of service?
An order of the day guides guests through the wider event. It may cover several locations or activities, giving readers an overview of what happens and when.
An order of service focuses on the proceedings within a particular service or ceremony. If your event includes a ceremony followed by other activities, use an order of the day for the full timeline and a separate order of service for the ceremony details. For more focused guidance on that format, see the order of service printing article.
Choose an Order of the Day Format That Fits Your Event
Choose a format based on how much information guests need, not just the look you want. A short schedule with a few milestones can fit on a single-sided card. If guests need more detail, a folded card or multi-page booklet gives you space to organise the content without shrinking the type or crowding the layout.
Consider how guests will use the schedule. A card they can carry suits an event with several transitions. At a fixed venue, a larger format may be easier to read on a table or at a welcome point. Think about the distance from which guests will read it, whether they’ll hold it, and how often they’ll need to refer to it.
When does a single-card schedule work well?
A single-sided card suits a short event or a schedule with only a few main stages. It gives guests a quick overview without requiring them to turn pages. Keep the type comfortably readable and leave clear space between activities so names and timings don’t run together. A folded card offers more room while staying compact, with related details arranged across its panels.
When should you consider a booklet or folded format?
Consider a booklet when the event has several stages, multiple locations or supporting details guests need to consult. Set a clear reading order, use informative headings and group related information together. For example, put the main timeline first, then use later pages for venue directions or additional event notes. Keep the schedule easy to find rather than burying it among supplementary content.
Plan the page count and layout together. A multi-page format needs a deliberate sequence so readers can move from one section to the next without confusion. Booklets and brochures accommodate more content than a simple card. For broader guidance on planning this format, see Professional Booklets and Brochures for London Businesses.
A straightforward schedule may not need a separate binding method. If you choose a multi-page document that needs to stay open for reference, wire binding lets it lie flat. Match the format to the schedule’s purpose, then prepare the content and artwork for the finished layout. You can discuss your event printing requirements with London City Print as you plan the next step.
Compare Paper, Colour, and Finishing for Order of the Day Printing
Paper, colour and finish affect how an event schedule looks and feels in guests’ hands. When planning order of the day printing, make these choices around how people will use the item. Guests may carry a card between locations, keep it on a table or read it while standing. A suitable specification supports both clear information and the event’s visual style.
How should you choose paper for an event schedule?
Think about how guests will handle the printed piece. A schedule intended to be carried should feel comfortable to hold, while one that will sit on a table may benefit from a more substantial feel. Paper weight affects stiffness and handling, but the right weight depends on the format and print specification. Settle those details before choosing a weight.
Prioritise legibility over decoration. Use strong contrast between text and background, and give timings enough size and space to stand out. Pale text on a busy background can be difficult to read, particularly in a dim venue. Review the schedule at its intended printed size to spot crowded information before production.
If material sourcing matters to your event, consider FSC-certified paper or eco-conscious stocks. Include your material preference in the print brief, while keeping readability and suitability for use as the main criteria.
How does CMYK affect colour in print?
CMYK stands for cyan, magenta, yellow and black. Printers combine these process colours to reproduce many designs on paper. A design viewed on a screen may not look exactly the same in print because screens emit light, while printed colours rely on ink or toner on a surface. Keep essential text in high contrast, and don’t rely on subtle colour differences to distinguish schedule sections.
Before approving artwork, check that the colours, text and background work together at the final size. Consistent colours can connect the schedule to other event materials, while a restrained palette keeps attention on the timings.
Which finishes suit a printed schedule?
A finish changes the surface appearance and feel of a printed piece. Choose one that supports the design rather than competing with the information. A reflective surface, for example, may catch light in a bright venue. Consider the setting and how guests will read the schedule before choosing a finish.
Custom finishing options, such as embossing, spot UV or foil stamping, can add visual or tactile detail when they suit the event. Treat them as design choices, not automatic requirements. Keep key timings easy to read, and align the finish with the paper and print specification before approving the artwork.
Prepare Your Artwork and Keep the Printing Schedule on Track
A clear production process starts before you send artwork. Confirm event details, approve the final timings, then prepare the layout for your chosen format. Allow time for proofreading and sign-off before placing the order. This sequence helps keep late changes out of the print file and the order of the day printing process on track.
What should you check before submitting artwork?
Review the finished document against the approved schedule. Check names, spelling, timings, venue details and page order. Then confirm that the document size and layout match the item you intend to print. For a folded card, check that the content sits correctly across each panel.
Save the design as a high-resolution PDF. This file format preserves layout, fonts and image quality for printing. Check that the PDF uses the correct page dimensions and that text and images sit within the safe area, away from trim edges.
If colour or images extend to the edge, add bleed. Bleed is extra artwork beyond the finished trim edge, helping avoid unprinted slivers after trimming. Crop marks show where to trim the sheet to its final size. Read the bleed for print guide for more detail.
Before submission, use pre-flight file checks to review resolution, colour profile, fonts and bleed. These checks can identify technical issues before production.
How can you reduce last-minute print problems?
Set a deadline for approving the schedule, separate from the date you need the printed items. Give the event team time to check the details and approve the artwork. Ask one person to collect corrections, resolve conflicting feedback and provide final sign-off. A single approved version reduces the risk of outdated timings or duplicate edits reaching the file.
Use this sequence to keep responsibilities clear:
- Confirm event content and venue details.
- Approve the schedule and timings.
- Prepare artwork to the finished size and format.
- Proofread the PDF and complete pre-flight file checks.
- Submit the approved file with the order details.
Keep the approved schedule and final artwork together so everyone works from the same version. Share your format, print quantity and prepared file when you discuss your event print requirements with London City Print.
Order of the Day Printing with London City Print: Plan Your Next Step
Once you’ve approved the schedule and selected a format, bring those decisions together in a clear print brief. Include the final text, event date, quantity and artwork files. Explain where guests will use the printed schedule, too. This context helps the print team prepare a layout for the event and its practical requirements.
London City Print is an independent Central London printer, based near the British Museum and founded in 2009. The company prints wedding stationery, including event schedules, and offers FSC-certified paper and eco-conscious stocks for event print projects. Set out your priorities clearly so the print brief reflects your schedule, chosen format and intended use.
What should you include in a print brief?
Prepare the information the print team needs to understand the job and review the artwork. Include:
- The approved schedule text and event date.
- Your intended format and required quantity.
- Artwork files prepared for the chosen format.
- A short description of the audience and venue setting.
- Any confirmed paper or finishing preferences.
Audience and setting can guide practical layout decisions. A schedule guests will carry between spaces, for example, may need a different approach from one displayed at a fixed welcome point. Include material or finish preferences in the brief, then choose a specification that suits the design and use.
How does a clear brief support dependable production?
Approved content and complete artwork help reduce avoidable questions during order preparation. They also give everyone a clear reference for checking the finished dimensions, colour and layout. Technical precision matters: an accurate schedule can still cause problems if the artwork uses the wrong page size, places content out of order or includes details that haven’t received final approval.
Keep the approved schedule and print file together, and identify the version ready for production. If you need to revise timings or wording, update the approved file before placing the order. A clear brief helps you move from event planning to print preparation with fewer uncertainties.
Share your schedule, format, quantity and artwork to plan your order of the day printing with London City Print.
Get Your Event Schedule Ready for Print
A useful order of the day starts with clear timings and activity names, then uses a format suited to the amount of information and how guests will use it. Readable type, suitable paper and prepared artwork turn the schedule into a practical guide guests can refer to throughout the event.
London City Print is an independent Central London printer, founded in 2009, with a facility near the British Museum. The company prints wedding stationery and offers FSC-certified paper and eco-conscious stocks for your event. Bring your approved schedule, chosen format and artwork together in a clear print brief.
Discuss your event print requirements with London City Print and take the next step towards a well-prepared printed schedule. Share your approved details and artwork to get your event print project moving.
Frequently Asked Questions
What is an order of the day for a wedding?
A wedding order of the day is a printed schedule showing guests the sequence and approximate timing of the day’s main events. It might list the ceremony, reception drinks, meal and speeches, with venue details where guests need them. A clear schedule helps guests know what’s happening next and when they may need to move. For order of the day printing, keep the essential timeline easy to scan.
What should you include on an order of the day?
Include the event date, activities in order, approximate timings and clear names for each part of the schedule. Add venue or transition details if guests need directions between locations or spaces. Keep personal messages and extra information secondary so they don’t compete with the timeline. Before preparing the artwork, check every name, time and location against the approved schedule to avoid printing outdated or incorrect details.
What is the difference between an order of the day and an order of service?
An order of the day covers the wider event timeline, which may include the ceremony, reception and activities afterwards. An order of service guides guests through the proceedings within a specific ceremony or service. If your event has several parts, use an order of the day for the overall schedule and a separate order of service for ceremony details. Keep each printed guide focused on its purpose.
What size should an order of the day be?
Choose a size that fits the amount of information and how guests will use the schedule. A compact card can suit a short timeline, while a folded or multi-page format gives you more room for additional details. Check that the type remains readable at the finished size, with enough space between activities. Consider whether guests will carry the schedule, read it at a table or refer to it from a distance.
Can I print an order of the day as a booklet?
Yes, a booklet works well when the event has several stages, locations or supporting details. Use clear headings and a logical page order so guests can find the timeline quickly. Keep the main schedule prominent, then place supplementary information where it supports the reader. A shorter event may need less space, so compare a booklet with a single or folded card before preparing the artwork.
How do I prepare an order of the day file for printing?
Confirm the schedule and proofread names, timings and venue details before preparing the final artwork. Set the document dimensions to match your chosen format, then export a high-resolution PDF to preserve fonts, layout and image quality. Add bleed if colour or images extend to the trimmed edge, and include crop marks to show the trim position. Pre-flight file checks should review resolution, colour profile, fonts and bleed.
How far in advance should I order printed orders of the day?
Plan your order around the event date, allowing time to confirm the schedule, prepare artwork, proofread and approve the final file before production. The time required can depend on the format, quantity and project details, so don’t leave content approval until the last moment. Set an internal sign-off date and work backwards from when you need the printed items. This gives you a clear production plan without relying on an assumed turnaround.